Converting from a SQL Server to another SQL Server using the Flex2SQL tool
The primary function of the Flex2SQL Utility (for either Classic Edition Driver or Unicode Drivers) is to take your existing DataFlex DAT tables and indexes and convert them to your target SQL backend. However, this utility can also be used to Transfer your existing SQL Tables:
Between 2 physical servers of the same type, for example from one MS SQL server to another.
Between 2 servers of different types, for example from a PostgreSQL Server to an MS SQL server.
In addition, it can also be used to rewrite your INT files from using DAW SQL drivers to Mertech drivers.
Transfer your existing SQL Tables
In this section the steps needed to transfer your tables are provided. After that, a sample transfer.
The steps needed to transfer your tables:
To begin the process, copy the .INT files from the data directory in your workspace into a separate folder. The location of this folder will be needed in step 5.
Run the Flex2SQL Utility (see Quick Start Guide, unicode or Quick Start Guide, classic edition for more details on how to start the utility) and log into the target server.
Select the Dataflex workspace which has the tables to convert if it is not already selected. Select and load the source tables (Unicode: Workspace Manager Classic: Workspace Manager).
Check the to make sure all the migration preferences are correct (Unicode: Preferences, Classic: Preferences).
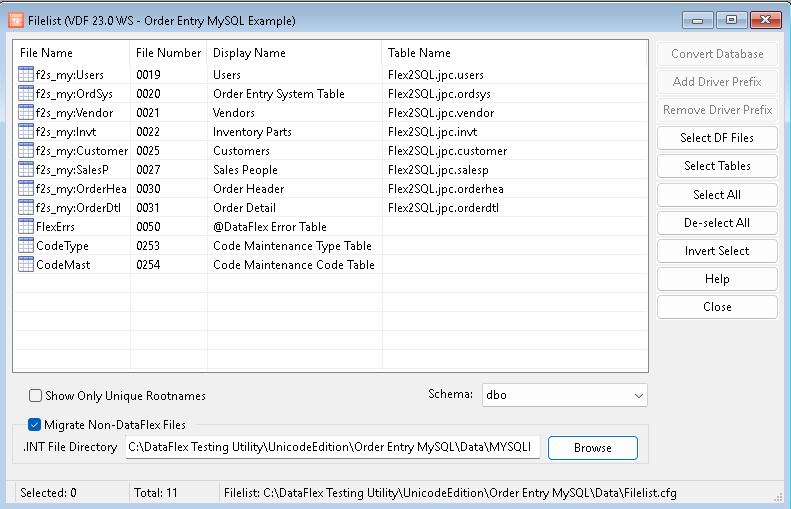
Set the Migrate Non-DataFlex Files checkbox in the Filelist dialog (Unicode: Filelist dialog, Classic: Filelist dialog) and either enter or browse to the directory containing the source INT files (see step 1).
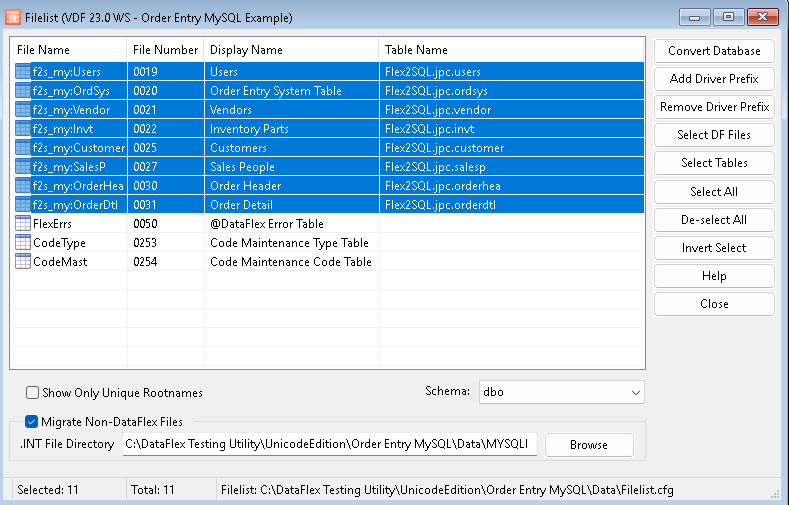
Select the files to migrate in the Filelist Dialog and Press the Convert Database button (Unicode: Convert Dat to Table, Classic: Convert Dat to Table).
Select Create Tables & Indexes and Migrate Data from the radio group and then press the Convert all.
When the process is complete, check the Migration report, , for details on the migration success.
At this point you may wish to update the login code, if you have any, to reflect the new server.
A sample tranfer
In this example, the Unicode Flex2SQL Utility will be used, however, the steps are the same for Classic Edition.
Initial configuration
The tables in the Order Entry Example from DAW reside on a MySQL server.
The tables need to be moved to an MSSQL Server.
The workspace, Order Entry My SQL Example, resides in C:DataFlex Testing UtilityUnicodeEditionOrder Entry MySQL
The transfer
Copy the .INT files into another directory: A new directory C:DataFlex Testing UtilityUnicodeEditionOrder Entry MySQLDataMYSQLINT is created and the .INT files in A new directory C:DataFlex Testing UtilityUnicodeEditionOrder Entry MySQLData are copied into this new directory.
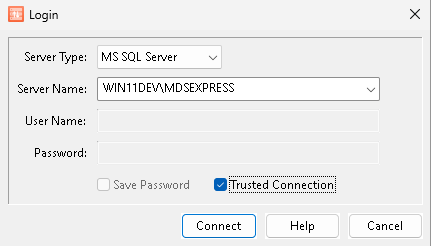
Run the Flex2SQL Utility and log into the target server: The target server is WIN11DEVMDSEXPRESS using a trusted connection:
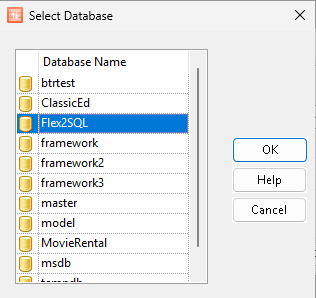
selecting the Flex2SQL Database:
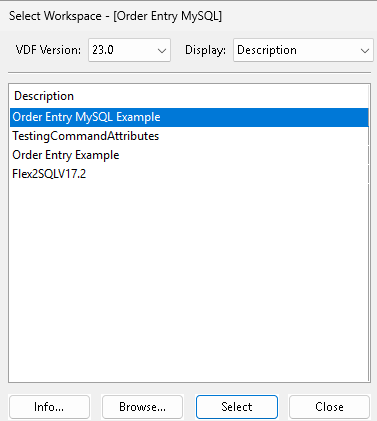
Select the Dataflex workspace: , selecting Order Entry MySQL Example.
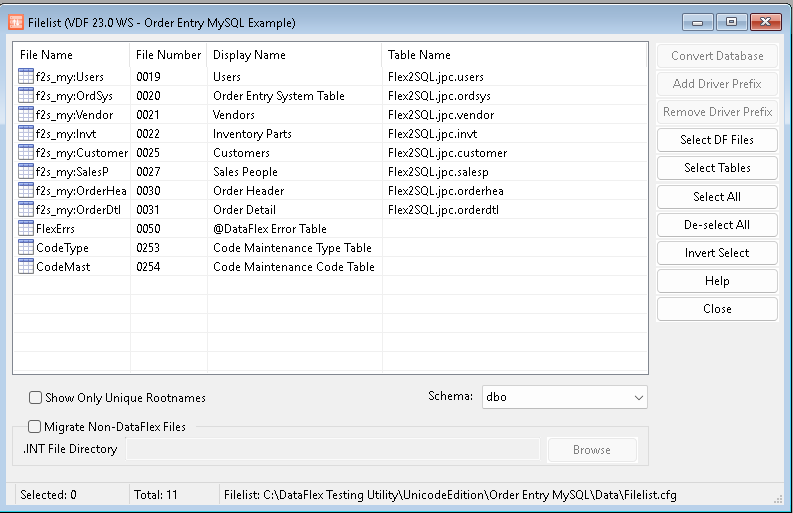
will display the filelist:
Check the Preferences: Navigate to :
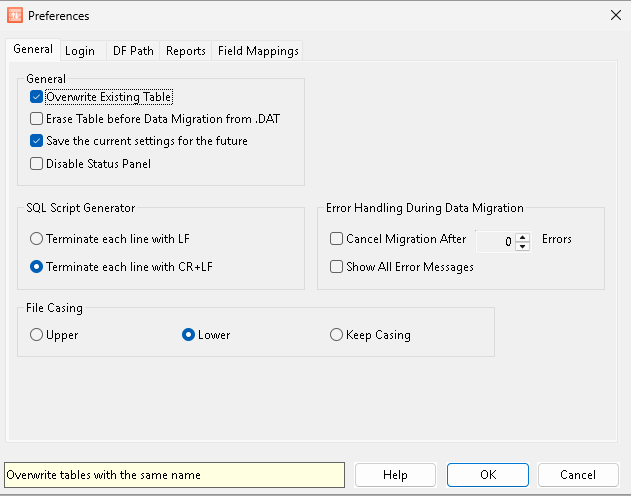
Once all the preferences are set, press OK. It may also be a good idea to clear the Migration Report (). This way only the conversion will be reported.
5. Set the location of the MySQL INT files: Check the Migrate Non-DataFlex Files and either press the Browse button and navigate to their location or enter it into the .INT File Directory form:
Select the files to migrate. In this case, I am migrating all of the MySQL tables (a quick way to do this is press the Select All button):
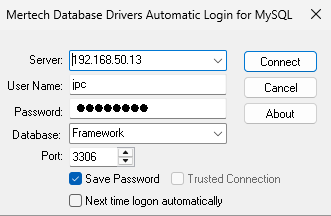
Press the Convert Database button. It will show the login for the MySQL (source database) server:
Once logged in, the Convert DAT to Table dialog will show:
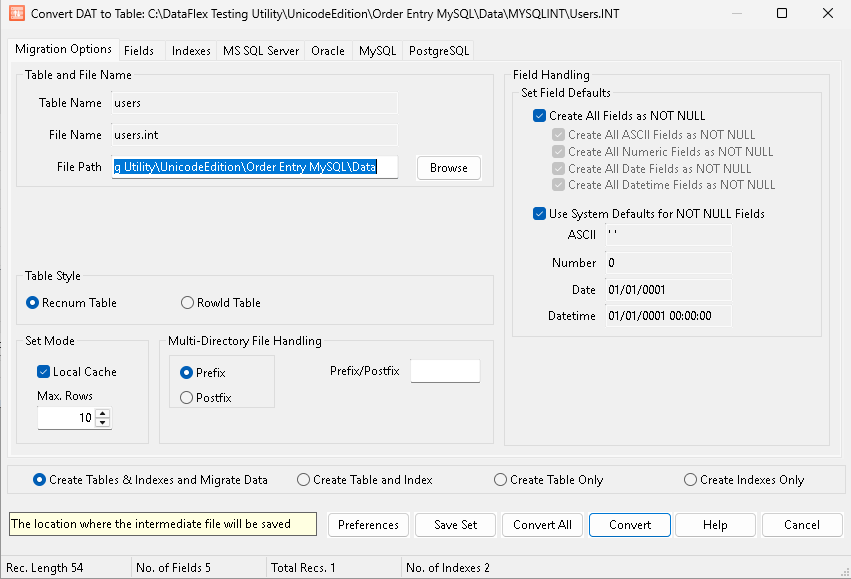
At this point, changes can be made as to how the data will be migrated. For Classic Edition, see Convert Dat to Table. For Unicode Edition see Convert Dat to Table.
Convert the Data: Select Create Tables & Indexes and Migrate Data from the radio group and then press the Convert all. This will close the Convert the Data and a new dialog will popup showing the progress of the conversion. For small tables like this it will go very fast.
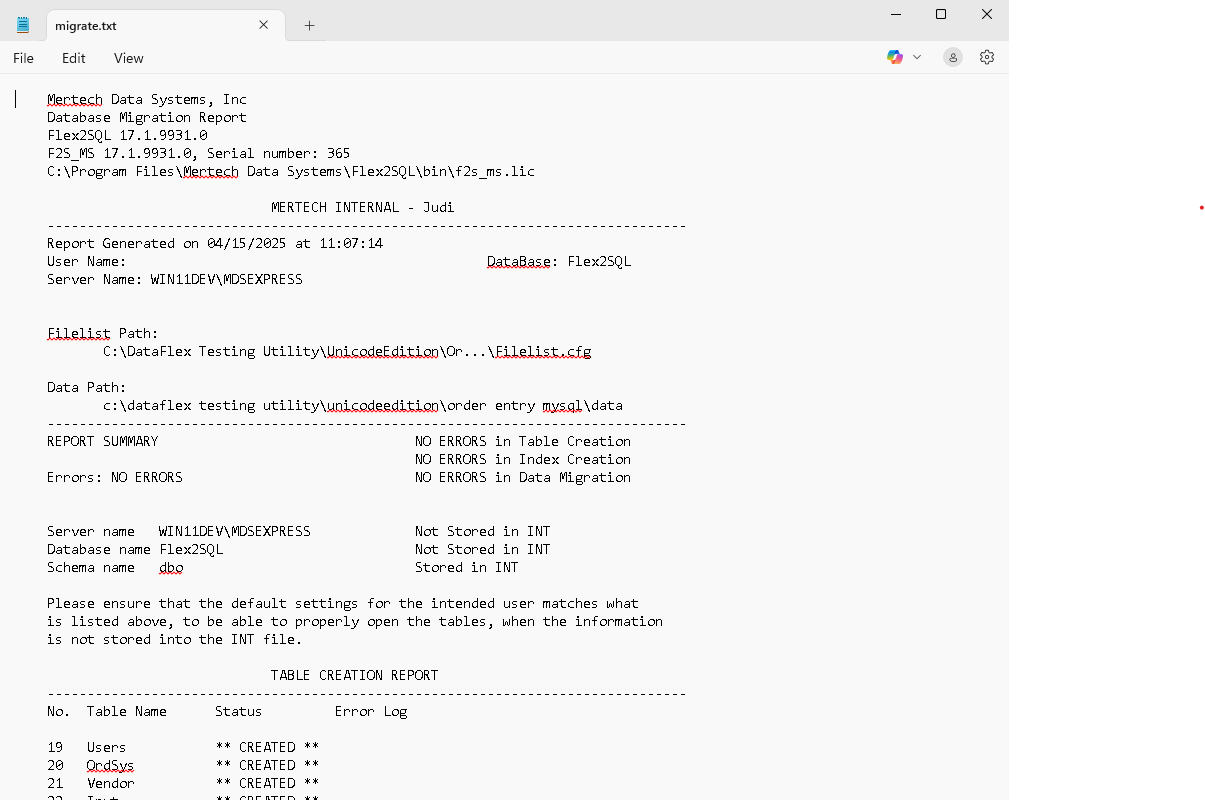
Check the Migration Log: When the process is complete, check the Migration report, , for details on the migration success.
The migration is now complete and the program code, if any is used, can be updated.