Monitoring and Managing Your API with Microsoft Azure API Management
Note
This feature requires a Microsoft Azure subscription and account. If you do not already have an Azure subscription and account, you’ll want to sign up for one using the instructions found on Azure’s official website before attempting to implement this feature.
Microsoft Azure’s API Management platform allows you to easily upgrade your Thriftly APIs by taking advantage of advanced API management and monitoring features. With Azure, you can extend your APIs’ functionality, adding additional layers of business insights, analytics, security, and protection without writing any additional code.

Using Thriftly’s built-in Web Services Description Language (WSDL) support (described in the Accessing Your API’s WSDL, WADL, or IDL topic), you can quickly import your Thriftly APIs into Azure API Management. Then, you can get started integrating advanced API features, such as throttling, custom authorization and authentication, metric tracking, and alerts, into your Thriftly APIs. Below, we’ll walk you through how to publish your Thriftly API to the Azure API Management platform.
Note
Want to learn more about Azure API Management before you get started? Click here to read Microsoft’s own overview.
To start using your Thriftly API with Azure API Management:
If you don’t already have a Microsoft Azure account, you must create one and log in. Otherwise, log in to your existing account. Note that, in addition to having a valid Microsoft Azure account, you must also have a valid Azure subscription to use Azure API Management.
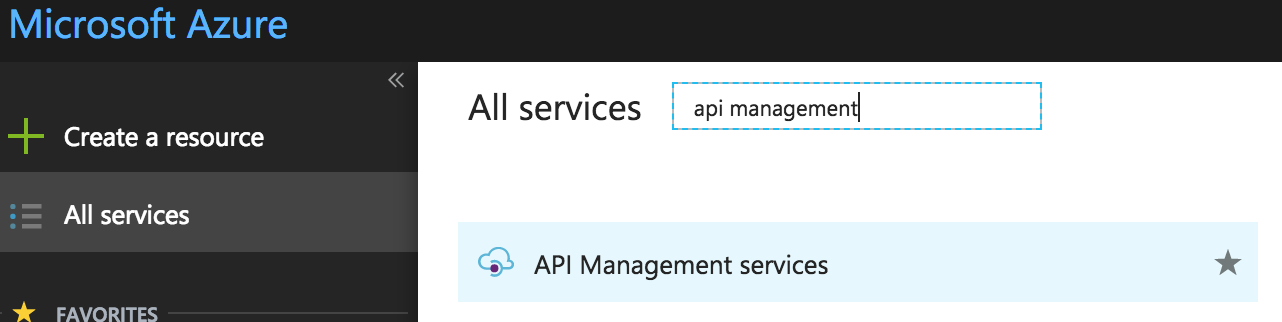
From the Azure portal’s left-side sidebar, select All services. Then, search for and select API Management services.
When the API Management services form appears, select Add. The API Management service form appears.
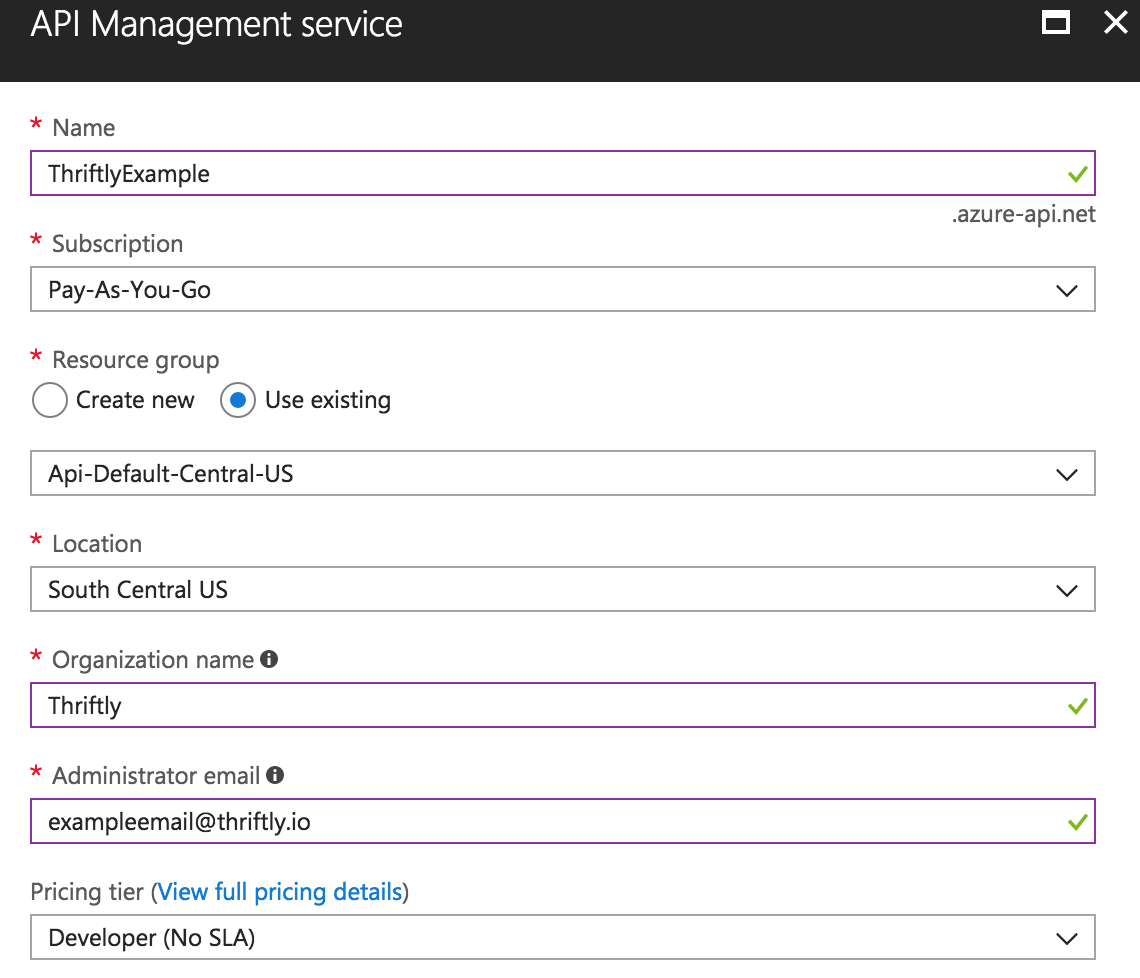
Using the information below, fill out the API Management service form:
In the Name field, enter a name for your API Management service.
In the Subscription field, enter your subscription plan. This field will likely auto-populate.
Use the Resource Group section to create or select the resource group to use for this API.
In the Location field, enter the geographic region in which you want to base your service. We recommend basing your service as close as possible to the Thriftly Gateway you use with your API, to increase your API’s performance. For example, if your API is deployed through Thriftly’s Texas Gateway, you should select South Central US here.
In the Organization name field, enter your organization’s name.
The Administrator email field should auto-populate with your email. If it doesn’t, enter your email.
In the Pricing tier field, select the pricing tier you want to use for this service.
Select the Create button to create your service.
Your API Management service appears within the Azure portal. Now, you must create a new Azure API and add it to your service, using your Thrifly API’s Web Services Description Language (WSDL) specification. This will import your Thriftly API into Azure:
Note
You need to find and note your API’s service URL before performing this step, so you can create a WSDL in the steps below. To do so, open your endpoint’s info from within the Thriftly Configurator (by selecting the endpoint and then selecting the Endpoint Info button) and copy your service’s URL. In step c below, enter your service’s URL appended with ?wsdl to generate a WSDL.
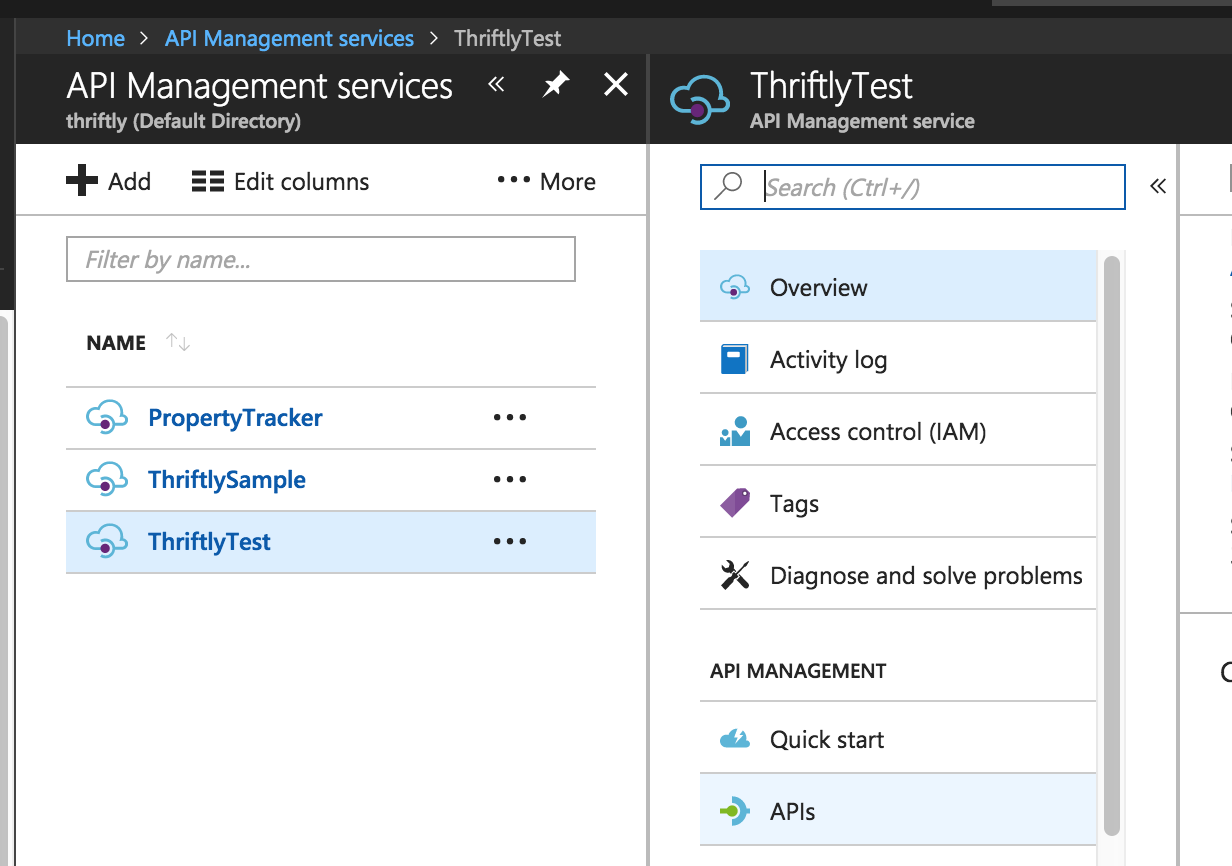
Select your newly created API Management service. Then, within the sidebar that appears to the right of your service’s name, select APIs.
The Add a new API page appears. Select the WSDL tile. The Create from WSDL window appears, allowing you to import your API.
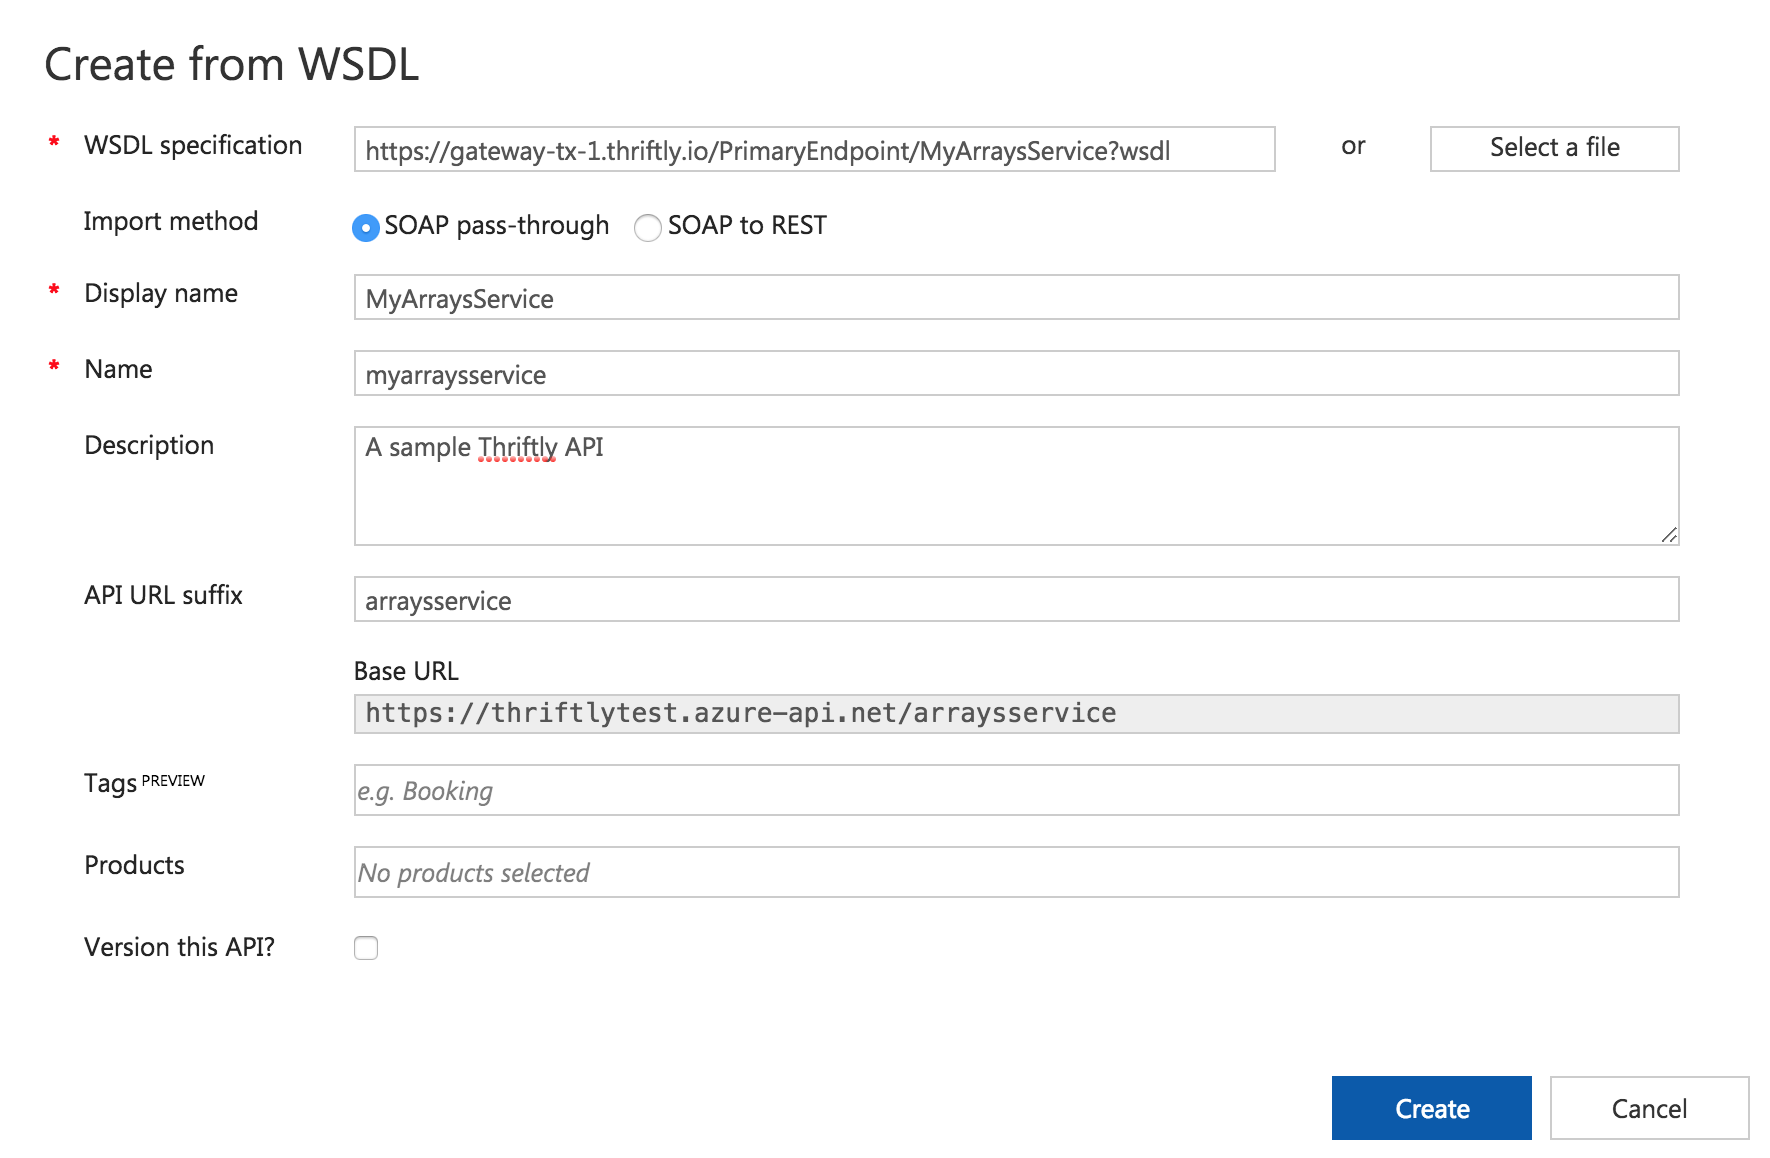
Use the following information to import your Thriftly API into Azure:
In the Create from WSDL window’s WSDL specification field, paste the URL of your API’s WSDL.
In the Import method section, select SOAP pass-through.
The Display Name and Name fields should auto-populate with settings from your API’s WSDL. Adjust the entries in these fields if necessary.
In the Description field, enter a description of your API.
In the API URL suffix field, enter a unique suffix to append to your service’s web address for this API.
If you already use Azure products and would like to add this API as part of a product, select that product in the Products field.
Select Create.
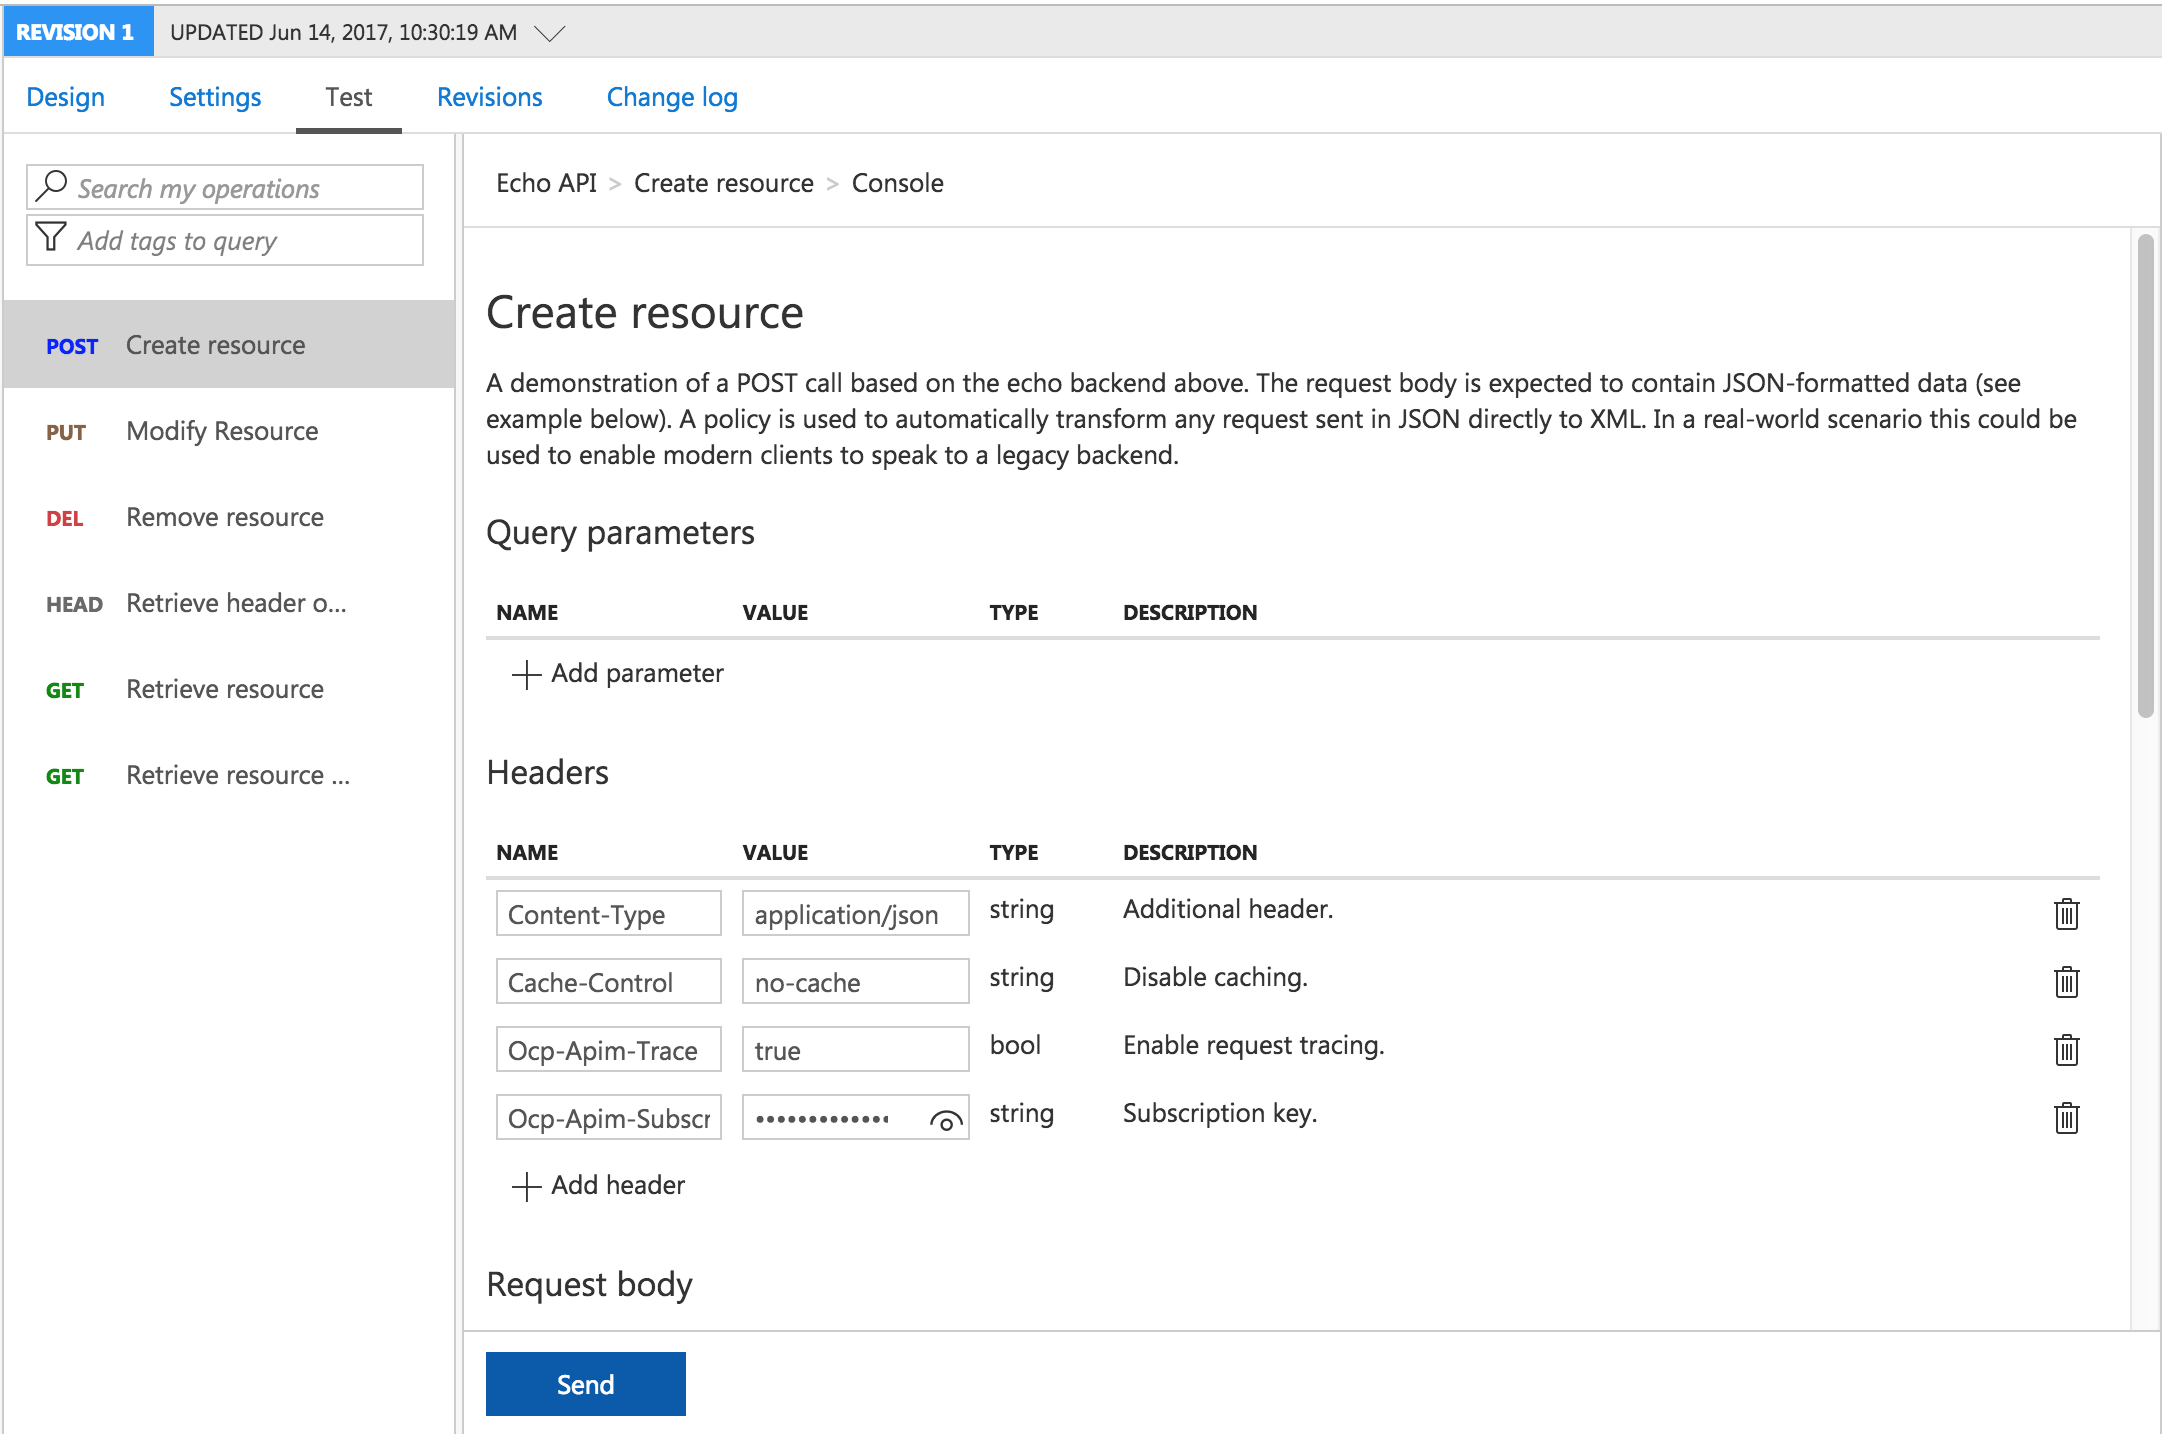
When your API appears in Azure, select it. You’ll see details about your API’s methods and design. You can also select Test from your API’s toolbar to get started testing your API within Azure.
At this point, you can begin testing, monitoring, and managing your Thriftly API from within Microsoft Azure. You can also allow your own or outside developers to begin accessing your API through Azure, by publishing your API as part of an Azure product. For more information on everything you can do with Microsoft Azure, we’ll refer you to Microsoft’s own Azure API Management tutorials, where you can learn how to publish, monitor, throttle, protect, and debug your APIs.
If you have any questions about Thriftly’s Azure API Management integration, email them to us at support@thriftly.io. If necessary, we’ll update this page to include the answer to your question, so others can find the information in the future.