Finalizing and Testing Your JWT Configuration
Normally, when you configure an application to use JWT-based authorization, you must manually update your application code to apply a hashing algorithm and related key/secret used to encode and decode JWTs on your server. However, Thriftly handles most of this work for you, allowing you to specify and apply a hashing algorithm and key/secret from within Thriftly itself, rather than manually updating your code.
After you create and apply your JWT configuration within Thriftly, you can get started testing your JWT-enabled APIs and making sure that calls to your application are protected. We’ll first walk you through creating and applying a JWT Configuration. Then, we’ll show you how to test your JWTs.
Creating a JWT Configuration
To create a Thriftly JWT Configuration, you must:
Run your application from your code editor, using your editor’s Run button. When you do, the Thriftly Developer window appears.
Select the JWT Configs button. The JWT Configurations Maintenance Window appears.

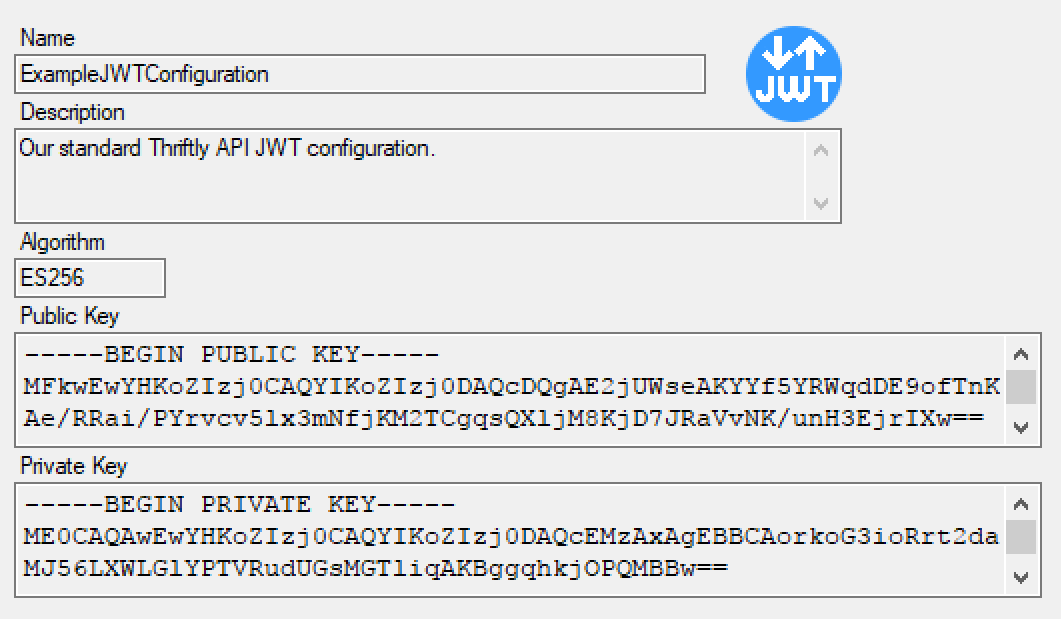
Select the Add button. Several fields appear on the right side of the window, including:
Algorithm
Description
Incoming Only
Configuration Name
In the Algorithm field, select the hashing algorithm to use to encode your JWTs. We currently support the ECDSA (ES), HMAC (HS), PSS (PS), and RSA (RS) algorithms, using SHA-256, SHA-384, and SHA-512 hashing. In most cases, we suggest you select and use the ES256 hashing algorithm. If you want to learn more about JWT hashing algorithms before making your selection, click here.
Note
You should use HMAC hashing only when using your API to share information between two trusted entities (e.g. conducting business-to-business API calls), as HMAC hashing requires that both your server and the client making an API call know the secret used to decode your JWTs. If your API will communicate with untrusted entities, do not use HMAC hashing.
In the Description field, enter a brief description of your JWT configuration.
You can use the Incoming Only checkbox to configure whether your API verifies JWTs only when receiving requests, instead of performing verification both when receiving requests and providing responses. We recommend leaving this checkbox unselected, so your API verifies JWTs during both requests and responses. However, if you want your API to verify JWTs only upon receiving requests, select this checkbox.
In the Configuration Name field, enter a unique name for this JWT configuration.
Select the
 button to continue.
Now, you must generate or import a key or secret that’s used to decode your JWTs. We imagine most Thriftly users will need to create a new JWT key/secret, so we’ll provide instructions for that first. If you want to import a key, skip to step 11. (Note that you cannot import secrets for use with the HS algorithm. You must generate your HS secrets within Thriftly.)
Select the Generate Key/Secret button.
If you are using a hashing algorithm that allows you to select a key size, the Generate Keys window appears prompting you to select a key size. You can create keys that are 1024, 2048, or 4096 bits long. We recommend creating a a 2048 bit key. Optionally, you can learn more about key length, and use that information to inform your decision, by clicking here.
(Skip if you performed step 10) To import your own pre-existing JWT key, select Import Key. The Import Keys window appears. You can import a public and/or private key to use with your JWTs.
Your public and private keys appear in the appropriate fields. Select Save to save your JWT configuration. The details of your configuration appear in the JWT Configurations Maintenance window.
Now, you must apply the configuration you created to your Thriftly APIs.
Updating Your APIs to Use Your JWT Configuration
After you’ve created your JWT configuration, you must apply it to your application and APIs. To do so:
From the Thriftly Developer window, select the JWT Configuration tab.

On the JWT Configuration tab, select the JWT configuration you want to apply to your APIs. Then, select the Incoming checkbox to apply the configuration to incoming calls and the Outgoing checkbox to apply the configuration to your API’s responses. Then, return to the Settings tab.
Note
In certain scenarios, you could end up configuring your APIs to accept JWTs from multiple sources that provide differently formatted JWTs. In these scenarios, you’d create multiple JWT configurations and select the Incoming checkbox for each of those configurations, so your API accepts all your organization’s incoming JWTs. However, your APIs can only ever output one style of JWT, so you can select the Outgoing checkbox for only one JWT configuration. If you find yourself in this situation, you may want to Contact Us for help with your JWT configuration.
You’ve now configured your application’s APIs to accept, require, and hash JWTs. Now, let’s test your JWT configuration, so you can see your JWTs in action, protecting your app, data, and APIs.
Testing Your JWT Configuration
Now that you’ve updated your application and APIs to accept and require JWTs, you should test your APIs to make sure your application’s Login function and JWTs work correctly. To do so:
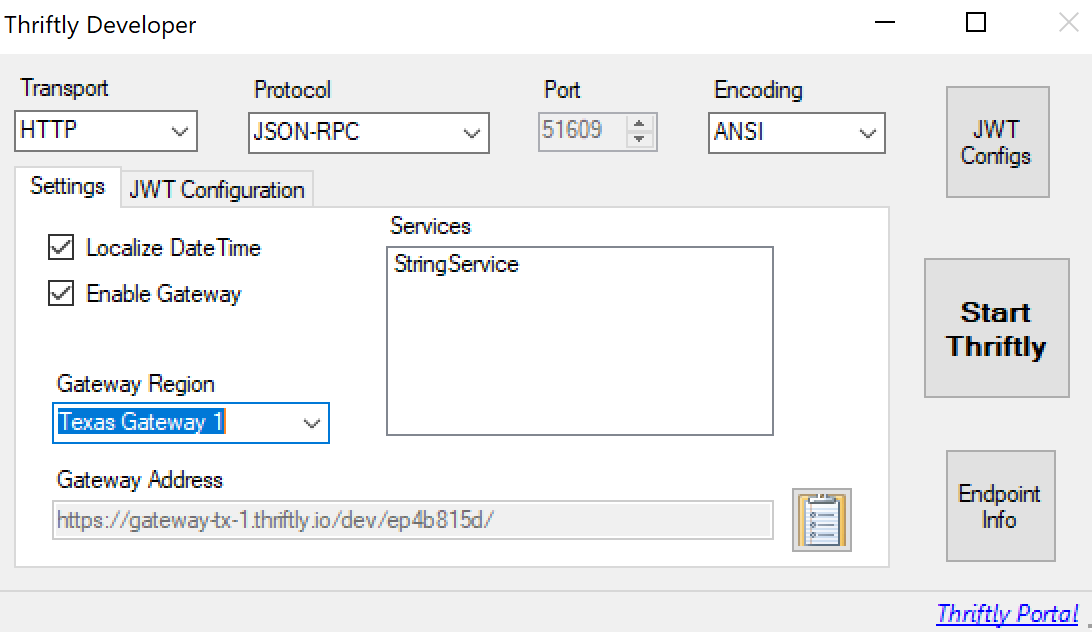
From the Thriftly Developer window, confirm that you’ve configured your API to launch through one of our Thriftly Gateways (by selecting the Enable Gateway checkbox and selecting a Gateway Region). Then, select Start Thriftly.
When your endpoint information appears in your web browser, select the Test API link from within the service you want to test.

The Thriftly API testing interface appears in your web browser. From the Method field, select LoginUser (or your API’s login function). Your function’s login parameters should appear in the Params field.
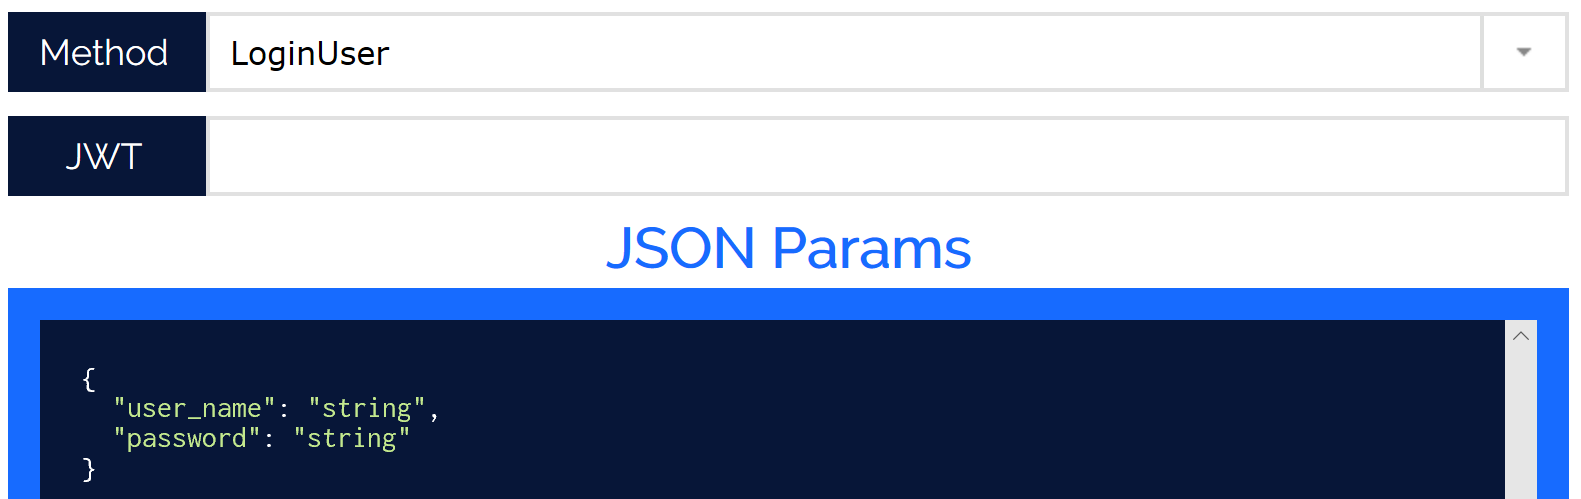
Enter valid login information in the Params field (for example, if you’re testing an API built from our examples, you would enter “thriftly” in both the “user_name and “password” parameters). Then, select Send.
A valid response should appear in the Response field, with a JWT access token included in its header. Additionally, your token should appear in the testing interface’s JWT field, and the Include JWT Token checkbox should now appear, allowing you to toggle including your JWT in subsequent calls.

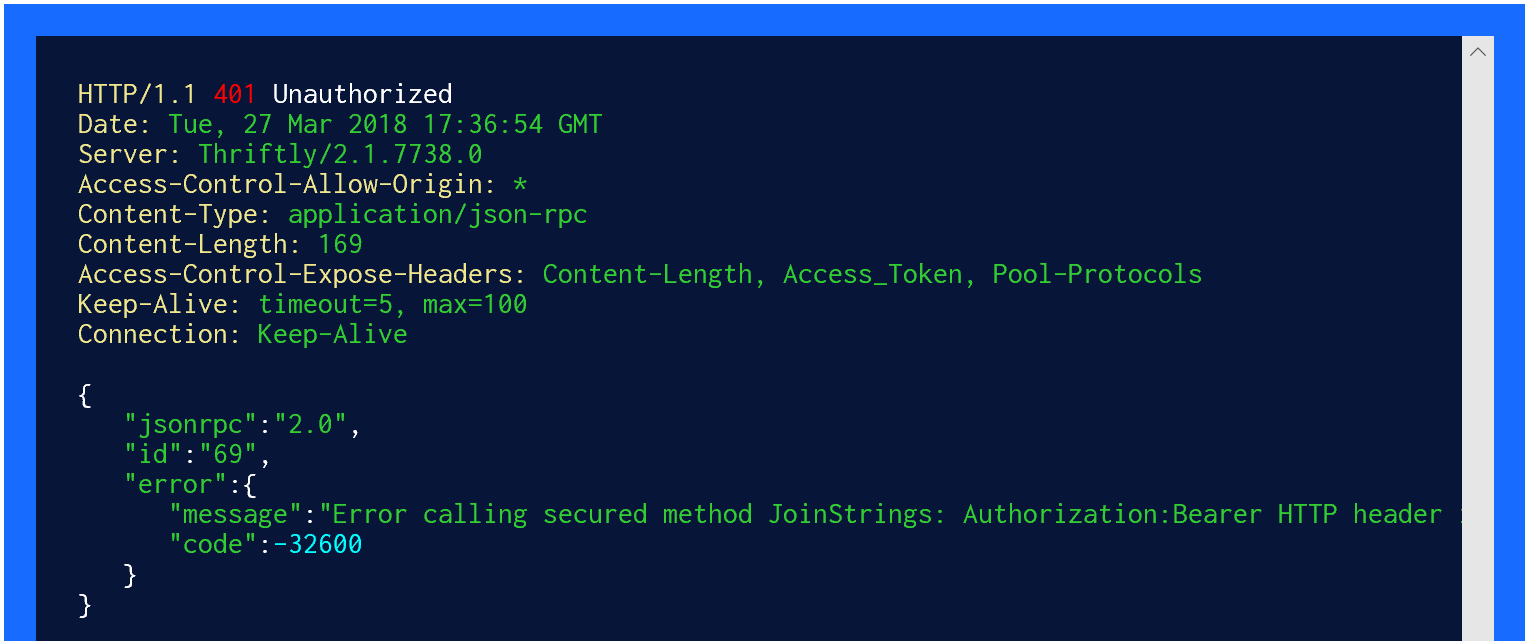
From the Method field, select one of your API’s secured methods. Then, clear the Include JWT Token checkbox. Attempt to make a valid call to your API.
You should receive an error similar to the one below, informing you that your call is not valid because it does not contain your JWT.
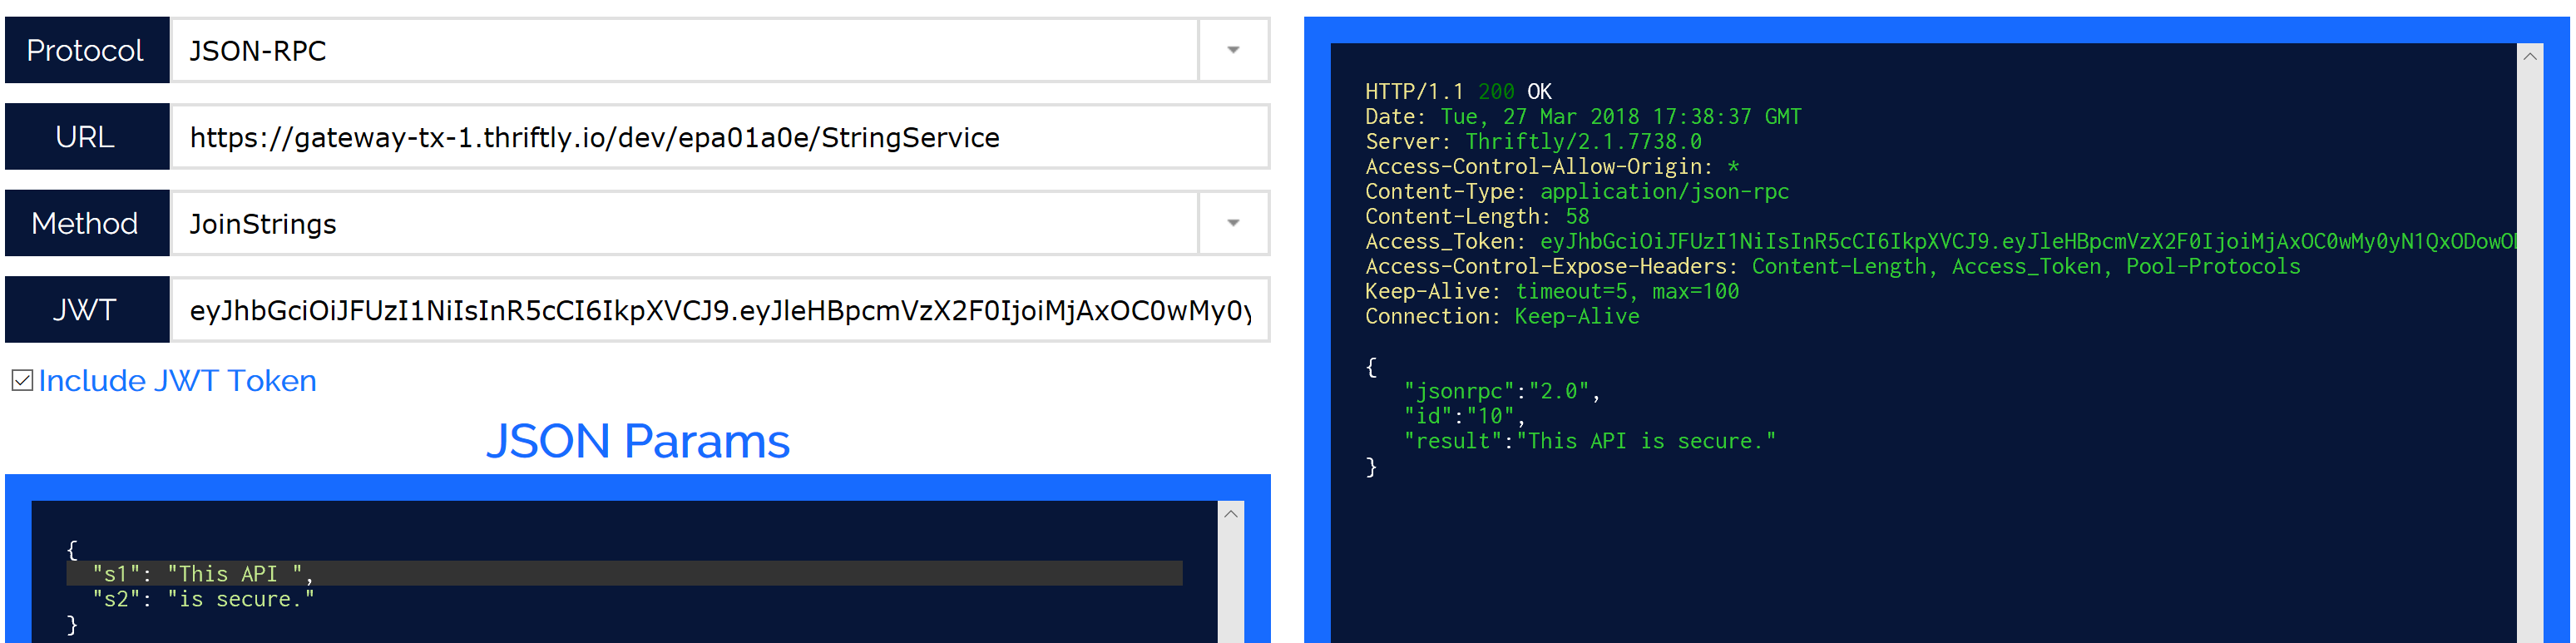
Select the Include JWT Token checkbox and make the same call. Your call should now include the JWT in its header and return a valid response.
You’ve now successfully configured your APIs to create, require, and hash JWTs and tested your configuration. But you’re not done quite yet. When you or your organization’s IT staff deploy your Thriftly APIs using Thriftly Deployment, you will have to configure Thriftly Deployment to apply a JWT configuration to your APIs, in much the same way you configured Thriftly Developer to apply a JWT configuration above.
Make sure your deployment staff knows that you’ve configured your APIs to generate and require JWTs, and make sure to point them to the instructions in the Configuring Your APIs to Handle JSON Web Tokens section when they deploy your Thriftly APIs, so your deployed APIs will authorize users using JWTs.
Additionally, in the following sections, you’ll find instructions for accessing your Thriftly-created JWT keys outside of Thriftly, in case you need to validate your JWTs on another server as part of your testing, and for deleting JWT configurations that you no longer need: