Adding and Accessing API Documentation
There’s no sense creating an API that no one can figure out how to use. That’s where Thriftly Developer’s easy API documentation feature comes in. By adding some simple documentation-related metadata within your application services, you can create always-available API documentation that informs other developers what each of the functions within your API does, how those functions are structured, and how to connect with them from new or outside applications.
To learn how to add documentation to your Thriftly APIs, and how to provide other developers with access to that documentation, read on.
Adding Documentation to Your API
Thriftly allows you to document what each function within your API(s) does, what parameters those functions accept, and what value(s) those functions return, so other developers can understand what your functions are used for and how they are constructed.
To add this documentation, you must update the services you use as Thriftly APIs to include Thriftly-related documentation metadata, as well as the applicable documentation. Then, when a developer accesses your service’s service URL, they’ll be able to view your documentation.
Due to differences between the programming languages we support, we’ve separated the instructions below into language-specific sections. Select the appropriate set of instructions from the list below to start adding documentation to your application’s APIs:
Adding Documentation to .NET/C#-based APIs
To update a .NET/C# service to contain API documentation:
Open your service within Microsoft Visual Studio.
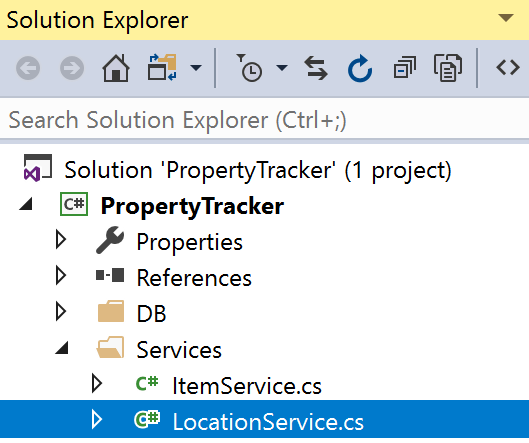
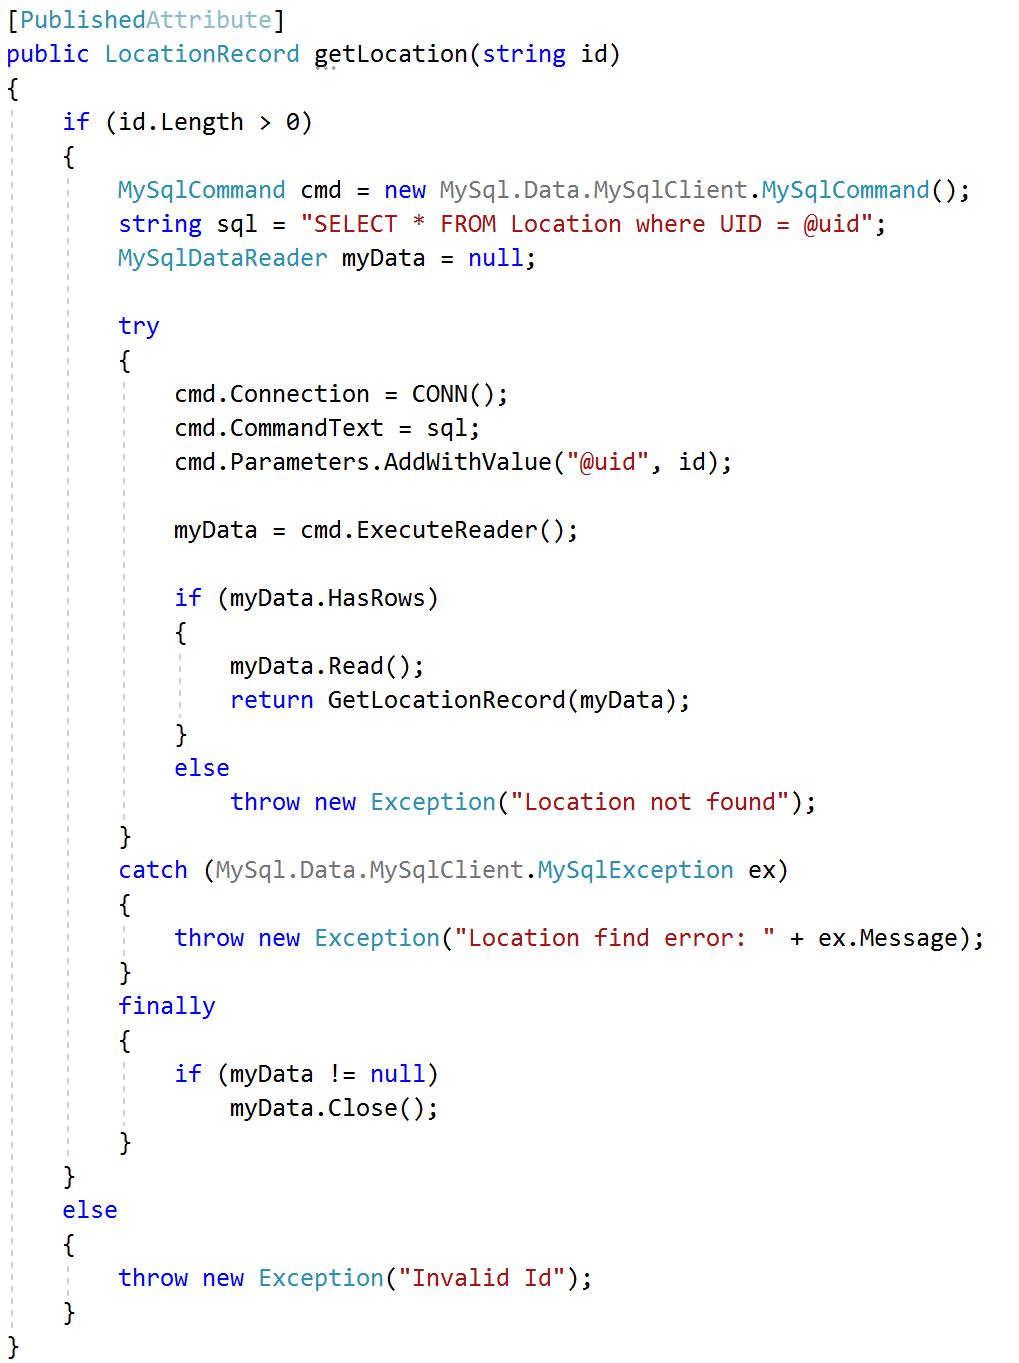
Scroll to the function for which you want to add documentation. In this example, we’re going to add documentation for the getLocation function contained within our example application’s LocationService. This function accepts a string-based location ID and returns the location(s) associated with that ID.
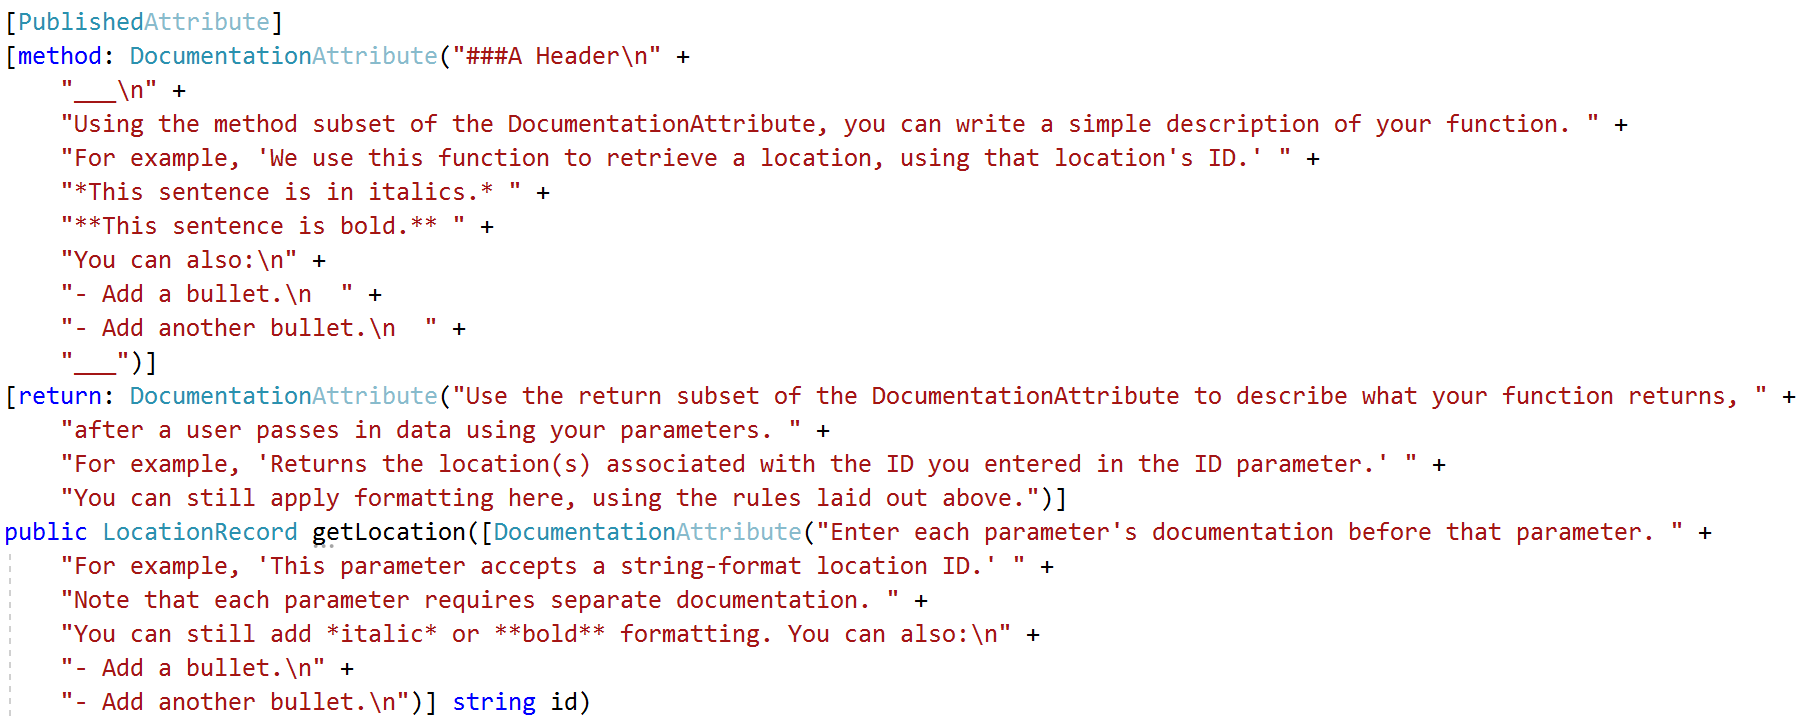
Within your function, add documentation using the formatting below. The picture below shows you how to add a description of your function (using the method subset of the DocumentationAttribute), descriptions for each of your function’s parameters (added directly before that parameter is created, using the DocumentationAttribute), and a description of what your function returns (using the return subset of the DocumentationAttribute). The picture also shows how to apply various formatting. We recommend that each line of your documentation not exceed 120 characters, to avoid unnecessary text wrapping issues.
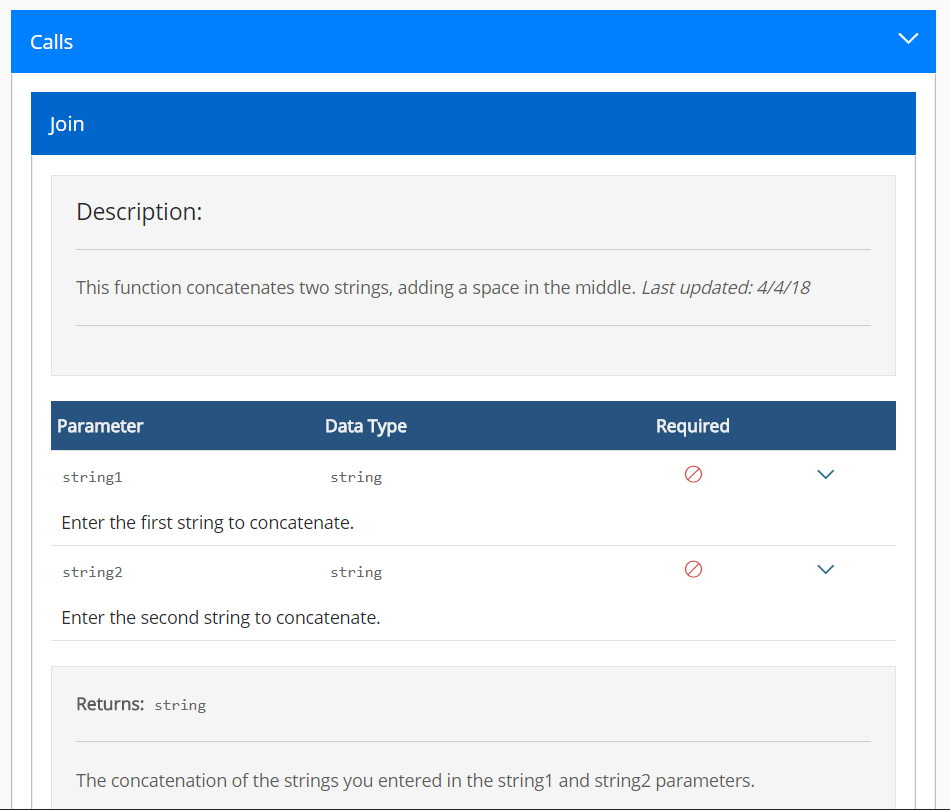
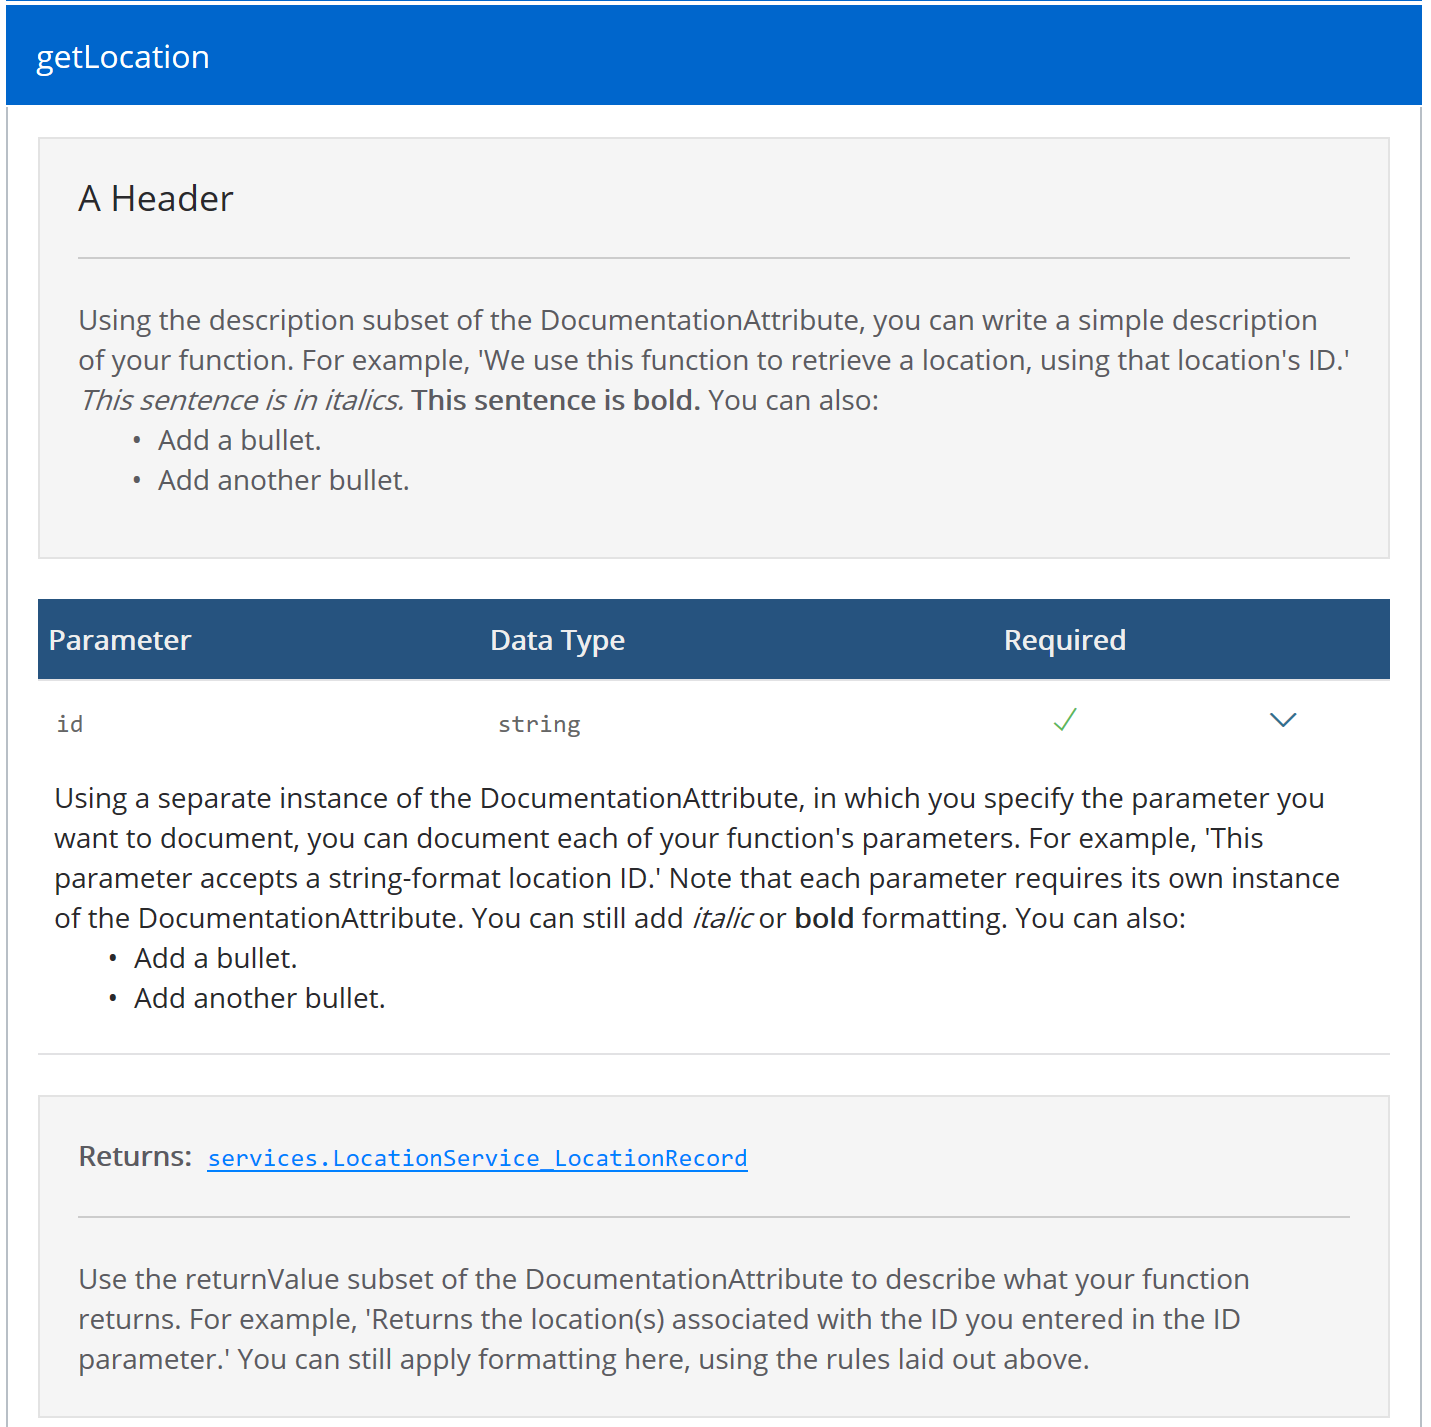
If you viewed the documentation pictured within step 3 from our GetLocation service’s service URL, this is what it would look like:
Repeat steps 2, 3, and 4 for each function you want to add documentation to. Then repeat all these steps for each other service whose functions need documentation.
After you’re done, jump to the Viewing Your API’s Documentation on the Web section, to view and test out your API’s documentation.
Adding Documentation to Java-based APIs
To update a Java service to contain API documentation:
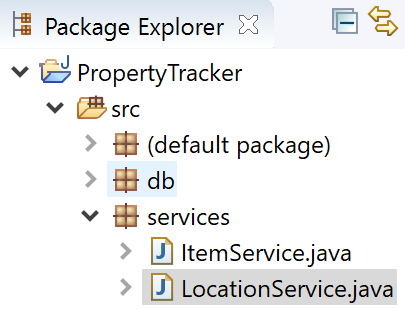
Open your service within Eclipse Java.
Within your service’s list of import directives, add the import thriftly.java.DocumentationAttribute directive.

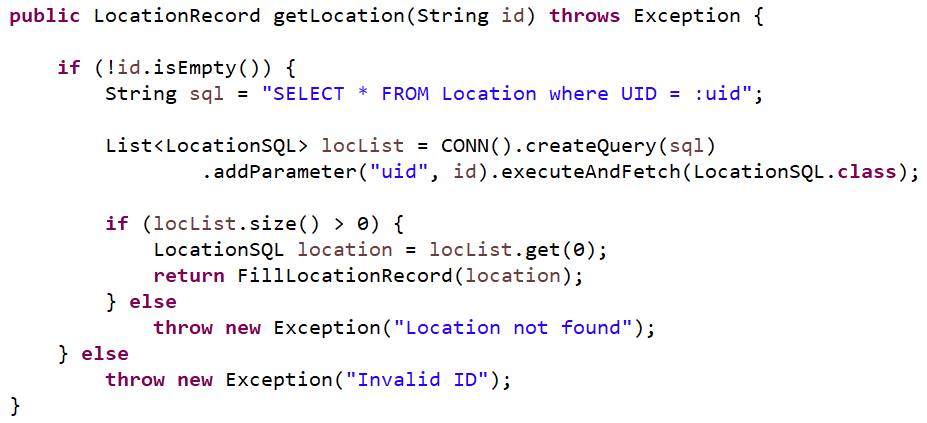
Scroll to the function for which you want to add documentation. In this example, we’re going to add documentation for the getLocation function contained within our example application’s LocationService. This function accepts a string-based location ID and returns the location(s) associated with that ID.
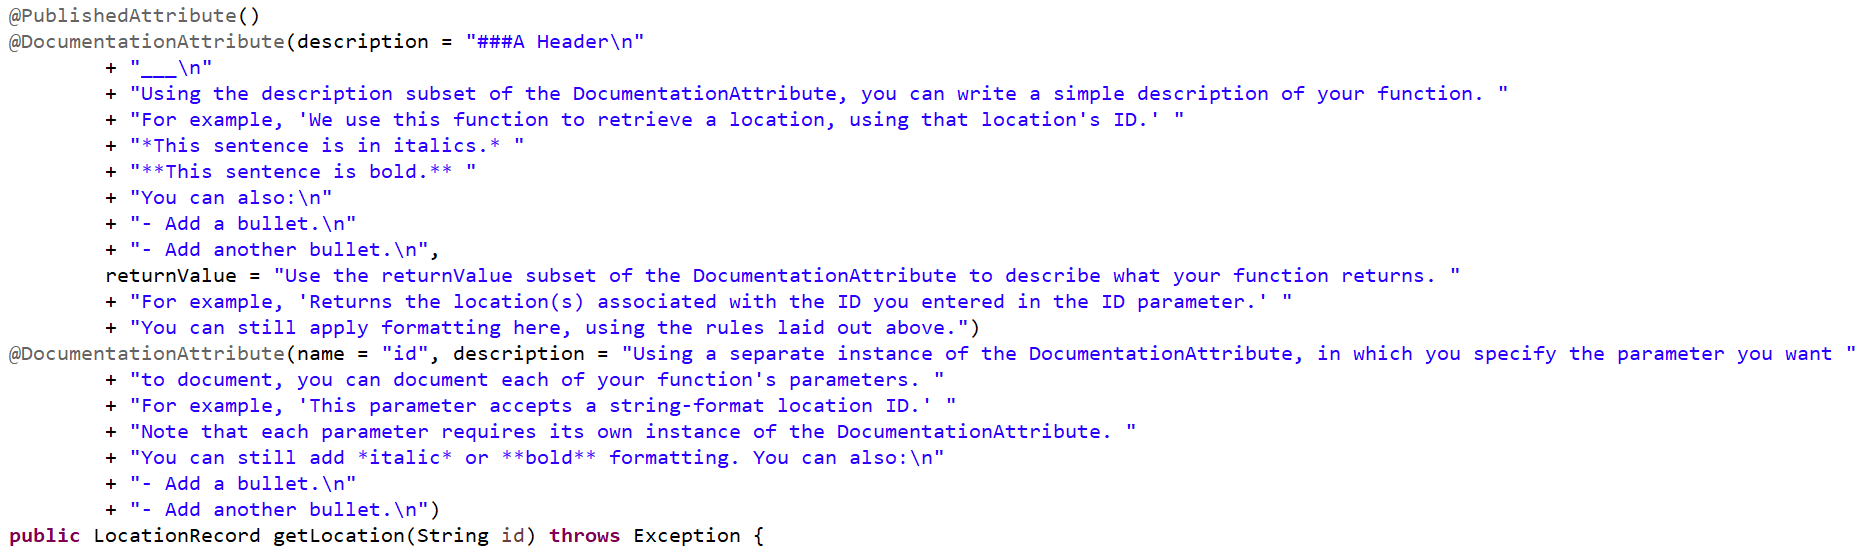
Directly above your function, add documentation using the formatting below. The picture below shows you how to add a description of your function (using the description subset of the DocumentationAttribute), descriptions for each of your function’s parameters (using the name and description subsets of the DocumentationAttribute), and a description of what your function returns (using the returnValue subset of the DocumentationAttribute). The picture also shows how to apply various formatting. We recommend that each line of your documentation not exceed 120 characters, to avoid unnecessary text wrapping issues.
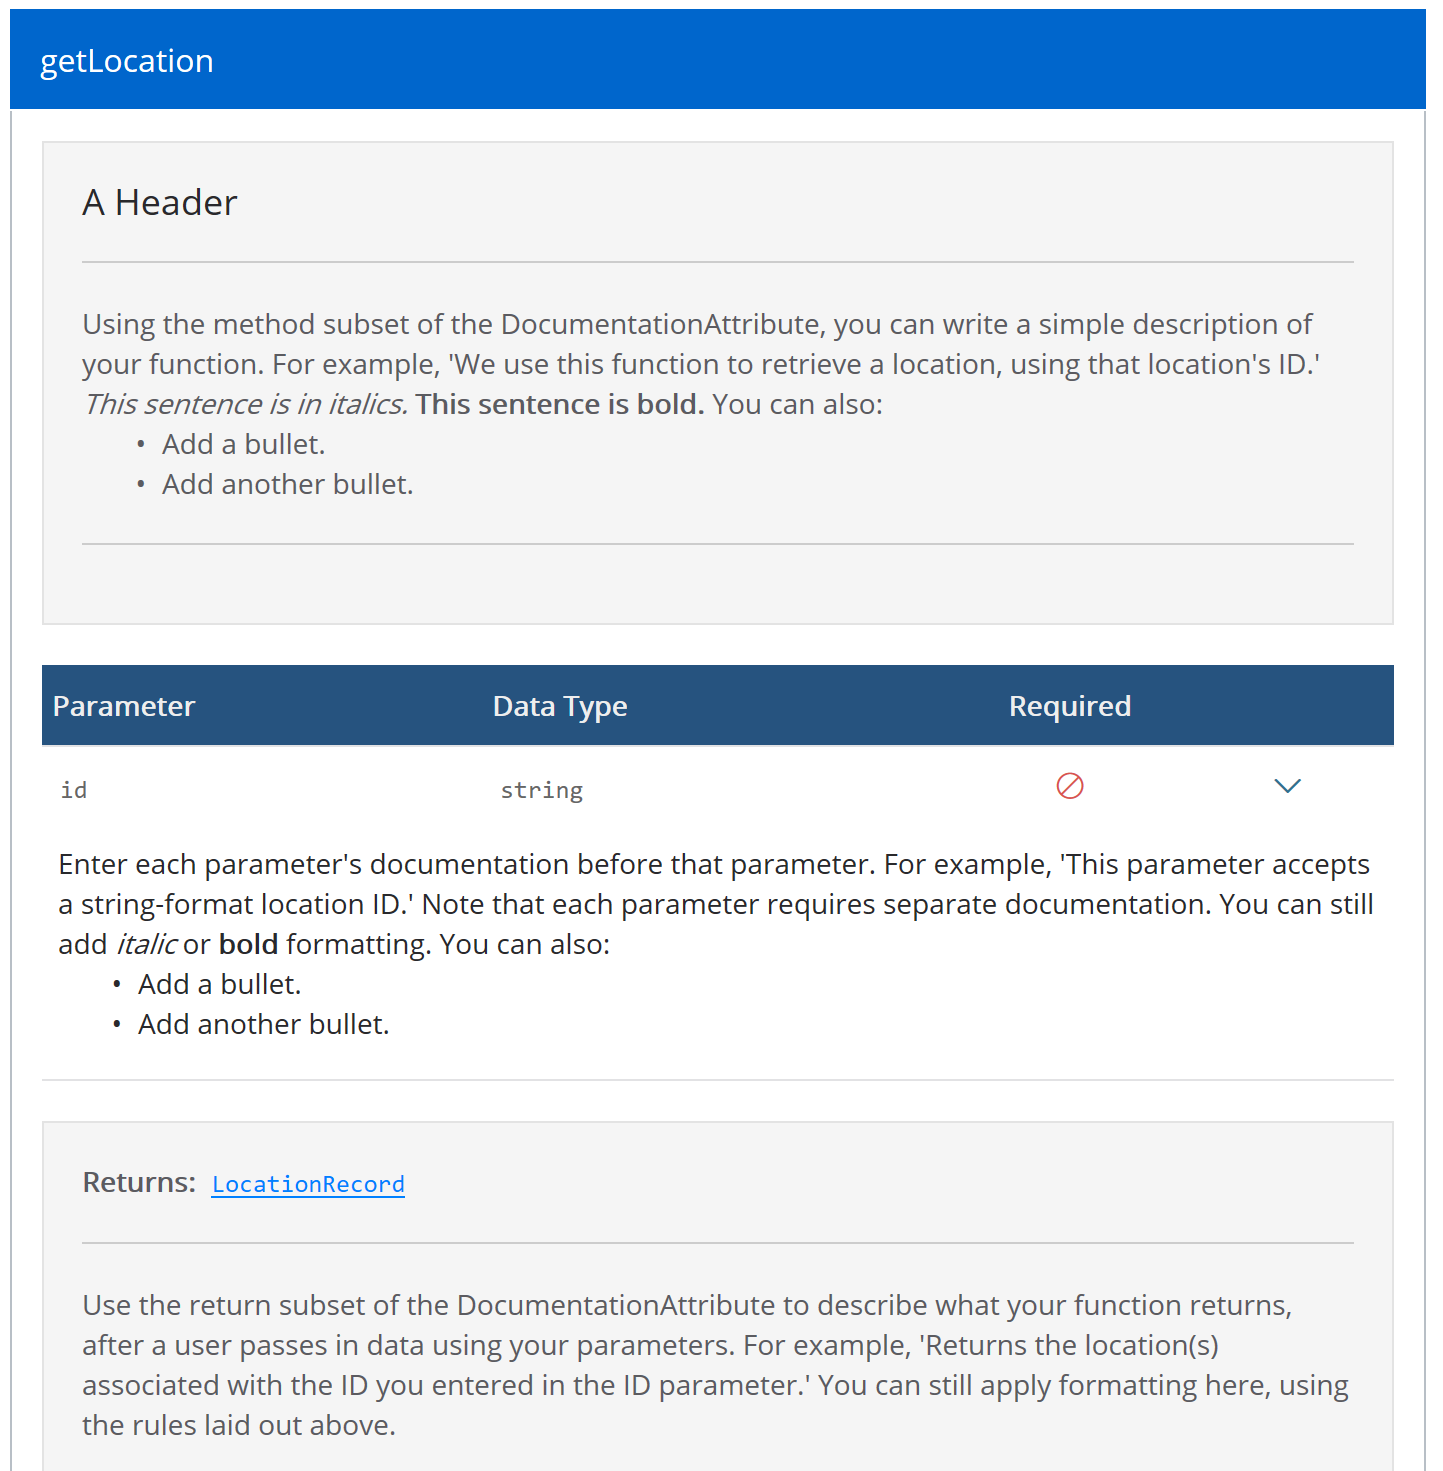
If you viewed the documentation pictured within step 4 from our GetLocation service’s service URL, this is what it would look like:
Repeat steps 3, 4, and 5 for each function you want to add documentation to. Then repeat all these steps for each other service whose functions need documentation.
After you’re done, jump to the Viewing Your API’s Documentation on the Web section, to view and test out your API’s documentation.
Adding Documentation to DataFlex-based APIs
To update a DataFlex service to contain API documentation:
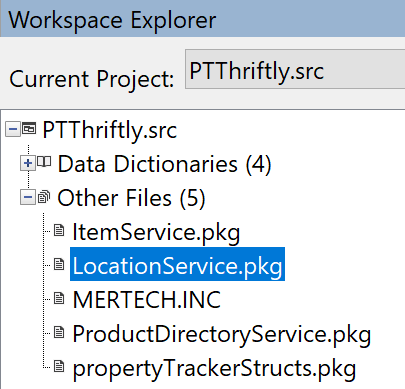
Open your service within DataFlex Studio.
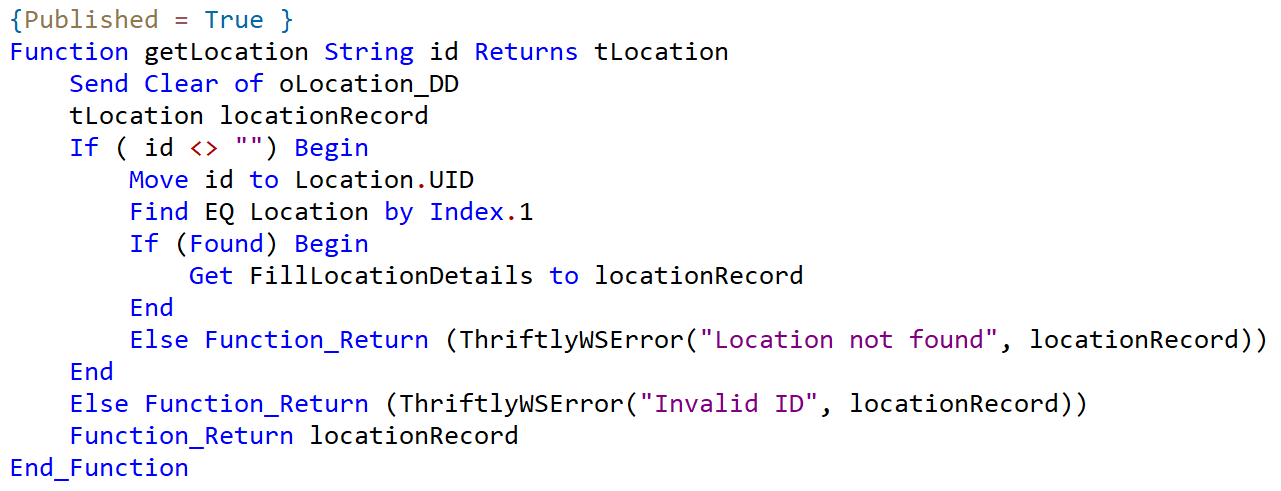
Scroll to the function for which you want to add documentation. In this example, we’re going to add documentation for the getLocation function contained within our example application’s LocationService. This function accepts a string-based location ID and returns the location(s) associated with that ID.
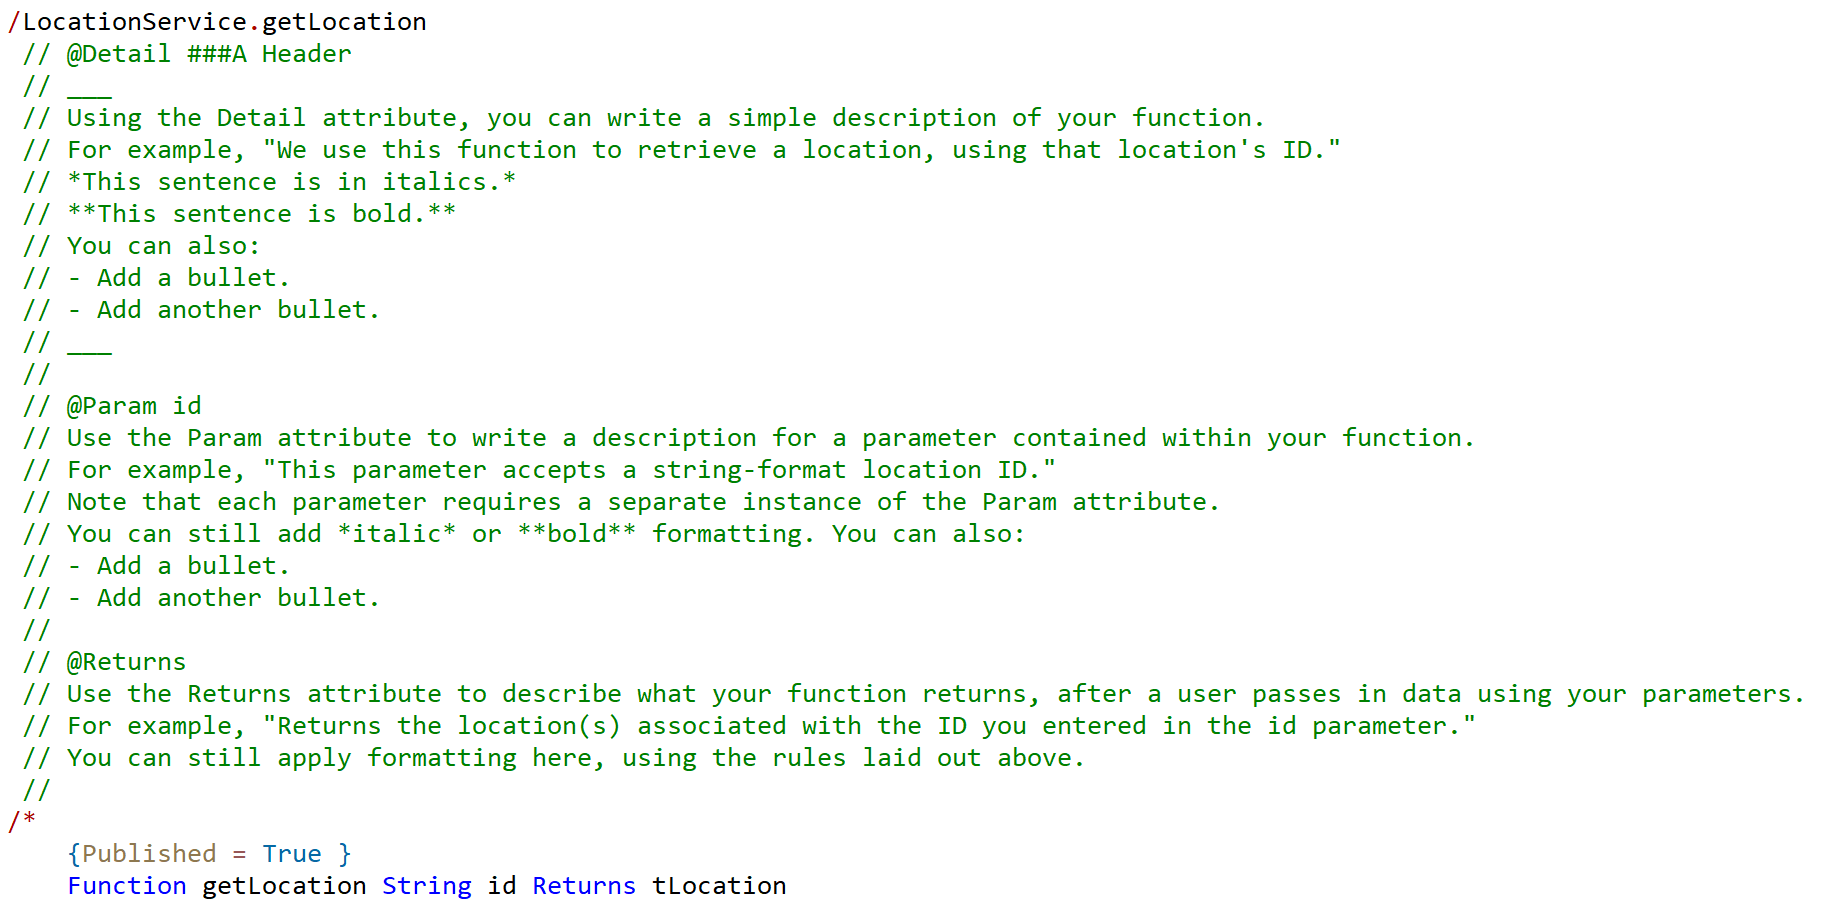
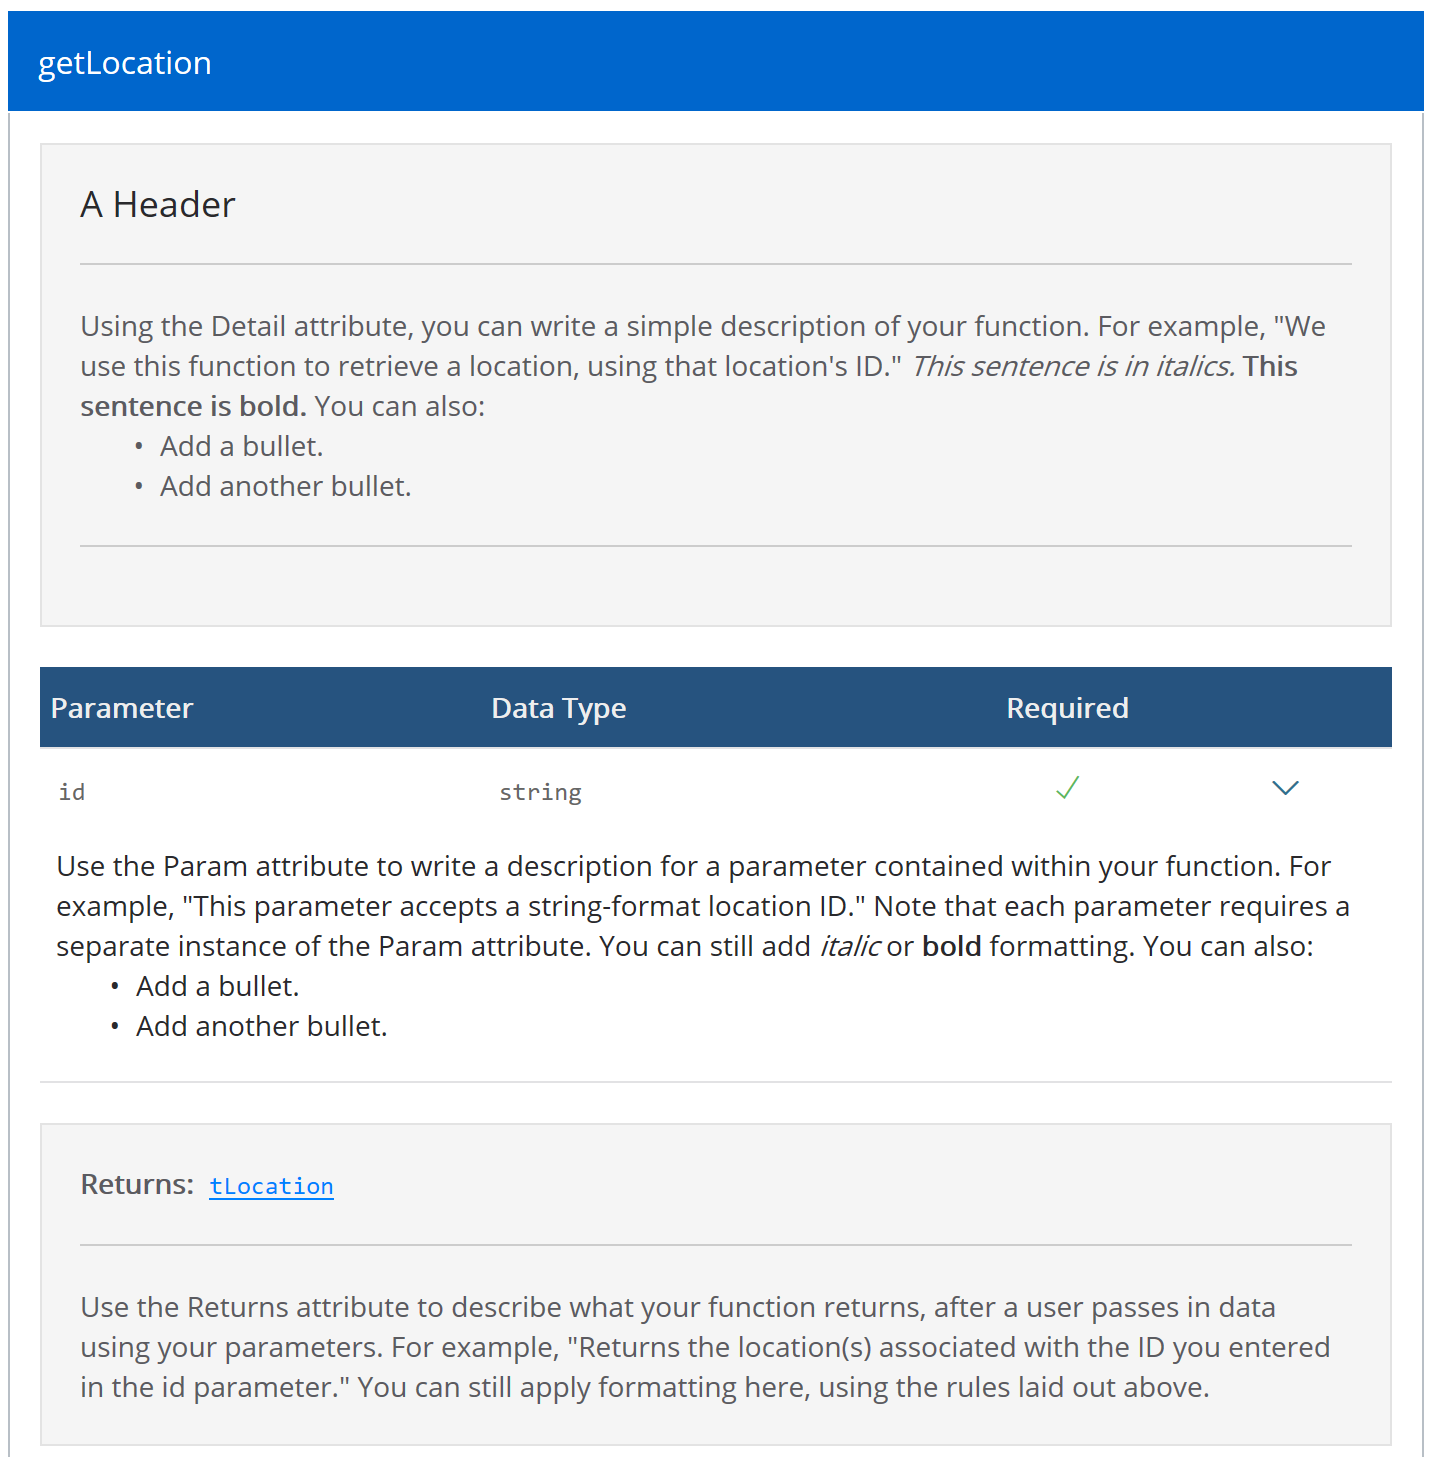
Directly above your function, add documentation using the formatting below. Every function’s documentation must begin with the /ServiceName.FunctionName string and end with the /* string. Additionally, the picture below shows how to add a description of your function (using @Detail), descriptions for each of your function’s parameters (using @Param), and a description of what your function returns (using @Returns). The picture also shows how to apply various formatting. We recommend that each line of your documentation not exceed 120 characters, to avoid unnecessary text wrapping issues.
If you viewed the documentation pictured within step 3 from our GetLocation service’s service URL, this is what it would look like:
Repeat steps 2, 3, and 4 for each function you want to add documentation to. Then repeat all these steps for each other service whose functions need documentation.
After you’re done, jump to the Viewing Your API’s Documentation on the Web section, to view and test out your API’s documentation.
Adding Documentation to Delphi-based APIs
To update a Delphi service to contain API documentation:
Open your service within Delphi RAD Studio.
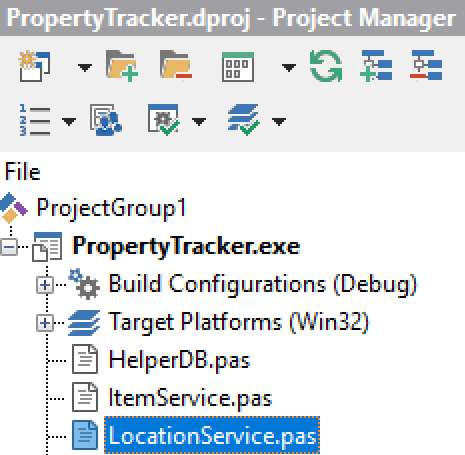
Scroll to the function for which you want to add documentation. In this example, we’re going to add documentation for the getLocation function contained within our example application’s LocationService. This function accepts a string-based location ID and returns the location(s) associated with that ID.

Directly above and within your function, add documentation using the DocumentationAttribute. The picture below shows you how to add a description of your function and what it returns, as well as descriptions for each of your function’s parameters. The picture also shows how to add minor formatting. We recommend that each line of your documentation not exceed 120 characters, to avoid unnecessary text wrapping issues.
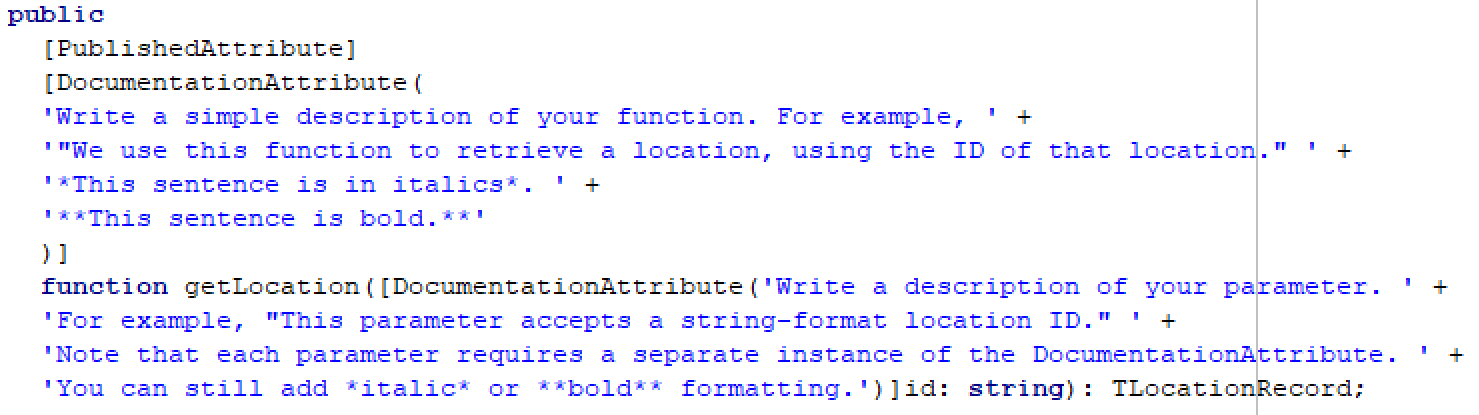
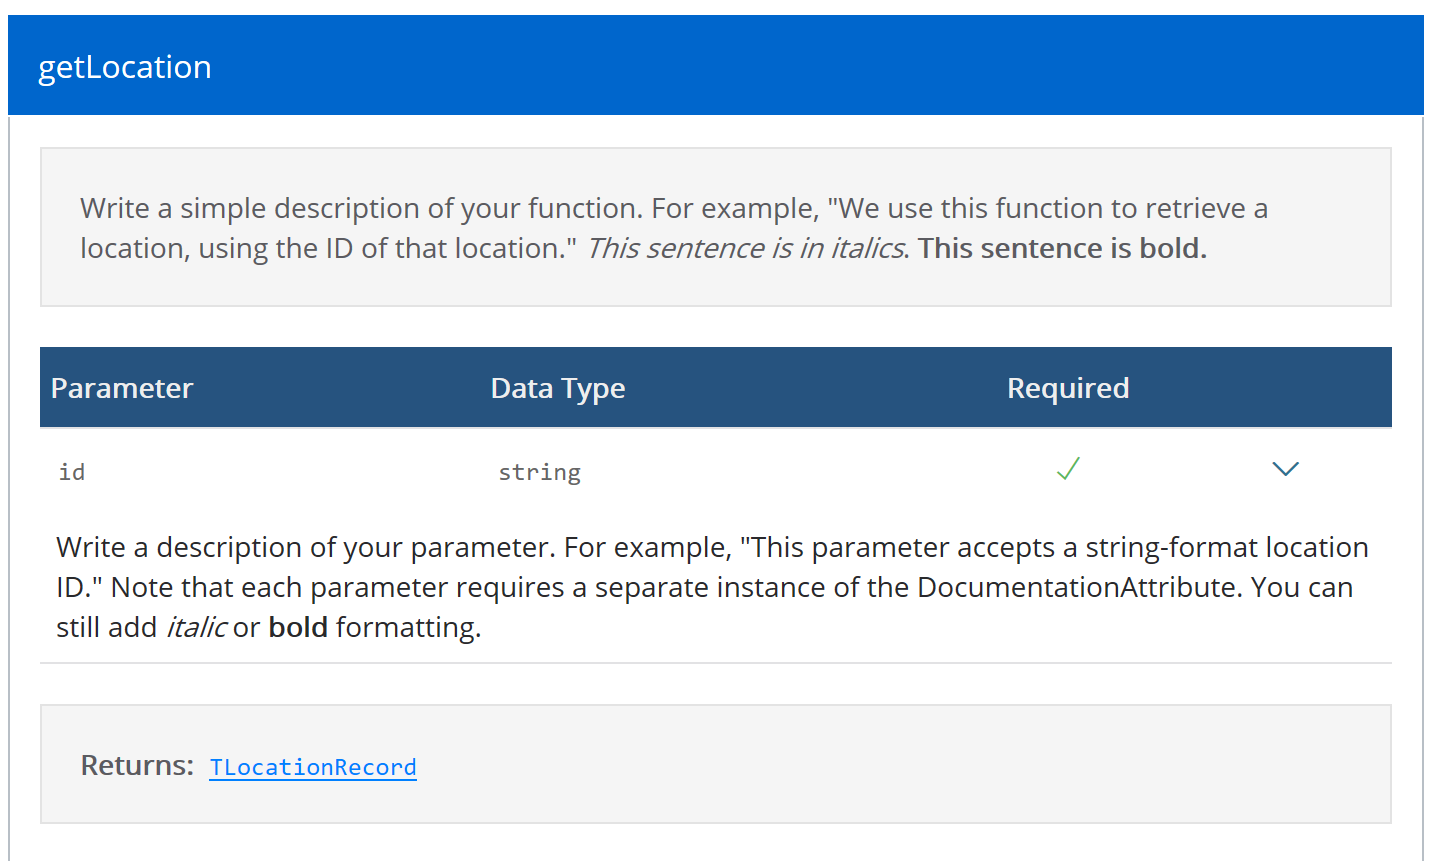
If you viewed the documentation pictured within step 3 from our GetLocation service’s service URL, this is what it would look like:
Repeat steps 2, 3, and 4 for each function you want to add documentation to. Then repeat all these steps for each other service whose functions need documentation.
After you’re done, jump to the Viewing Your API’s Documentation on the Web section, to view and test out your API’s documentation.
Viewing Your API’s Documentation on the Web
After you’ve added documentation to your APIs, you’ll want to test that documentation to make sure it appears as you expected and will be useful to other developers. To do so:
From your code editor, Run your application. The Thriftly Developer window appears.
With the Enable Gateway checkbox and a Gateway Region selected, select Start Thriftly.
Your application’s endpoint appears in your web browser. From the Services section, select one of the services to which you added documentation (by clicking the blue bar that includes the service’s name).
Your service appears in your web browser. Expand the Calls section, then select one of the functions for which you added documentation. Any documentation you added for that function, its parameters, and its return values should appear.
Be sure to examine each service and function for which you added documentation. When you’re satisfied that your documentation appears as you intended, return to the Thriftly Developer window and Stop Thriftly.
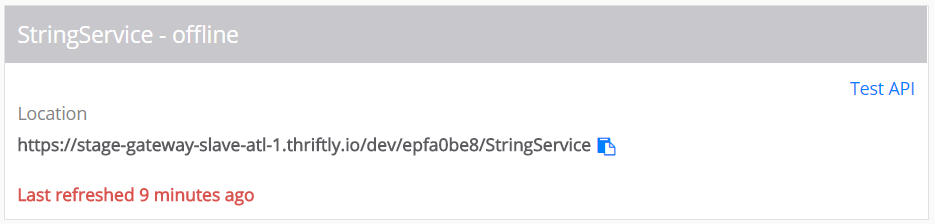
Now, we want to show you what we mean when we say your API documentation is always available. You’ve now stopped Thriftly, meaning you, outside developers, and outside applications can’t access your API. However, you can still access your API’s documentation, as Thriftly caches that documentation each time you start Thriftly.
After making sure you’ve stopped Thriftly from the Thriftly Developer window, refresh the web page at which you are viewing your service.
The web page showing information about your service should appear almost exactly as it did before you stopped Thriftly, except for a new message that appears telling you when your API’s documentation was last refreshed. You and other developers can continue to view the last cached version of your API’s documentation, even while your API itself is offline.
Your newly added API documentation will also appear within your services’ web pages when you or your company’s IT staff actually deploy your APIs using Thriftly Deployment. If you’re working with separate deployment staff or outside developers, be sure to inform them of your API’s documentation, so they know where to find it after you deploy your Thriftly APIs using Thriftly Deployment.