Creating Your Own Basic Thriftly APIs
Now that you’ve examined our example application and APIs, we’ll walk you through creating your own simple application that includes two Thriftly APIs. These APIs, built from .NET/C# services, will return strings, boolean values, and lists. One service will operate on primitive data types, and the other will operate on arrays.
To get started, we’ll create a new .NET/C# application.
Creating Your Application
If you don’t already have it open, launch Microsoft Visual Studio.
From the Visual Studio toolbar, select File > New > Project.
The New Project window appears. Select Console App (.NET Framework). Then, select OK to create a new console application. Your new project appears in Visual Studio.
Now, you must modify your app to reference the Thriftly.Server library, so your application can call the Thriftly Server and include the PublishedAttribute attribute. To do so, go to the Visual Studio toolbar and select Project > Add Reference.
When the Reference Manager window appears, select the Browse… button. Then, navigate to
C:\Program Files(x86)\Thriftly Developer\bin. Select Thriftly.Server.dll, then select the Add button.In the Reference Manager window, select OK.
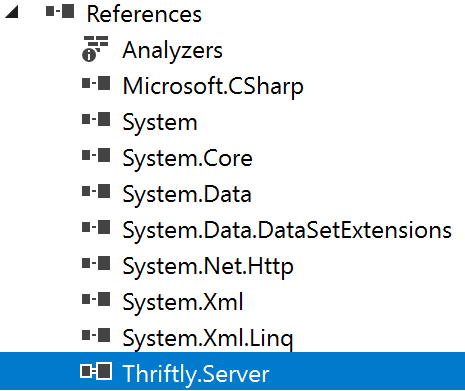
The Thriftly.Server reference should now appear under the References section in the Solution Explorer.
Now that you have your application set up, you must modify it to:
Include the Thriftly.Server library.

Create a Thriftly Server object.

Call the services we’ll create and define in the next set of setup steps.

Send the StartServer command to the ThriftlyServer object.

Basically, you need to modify your project’s Program.cs file so it reads like the code below:
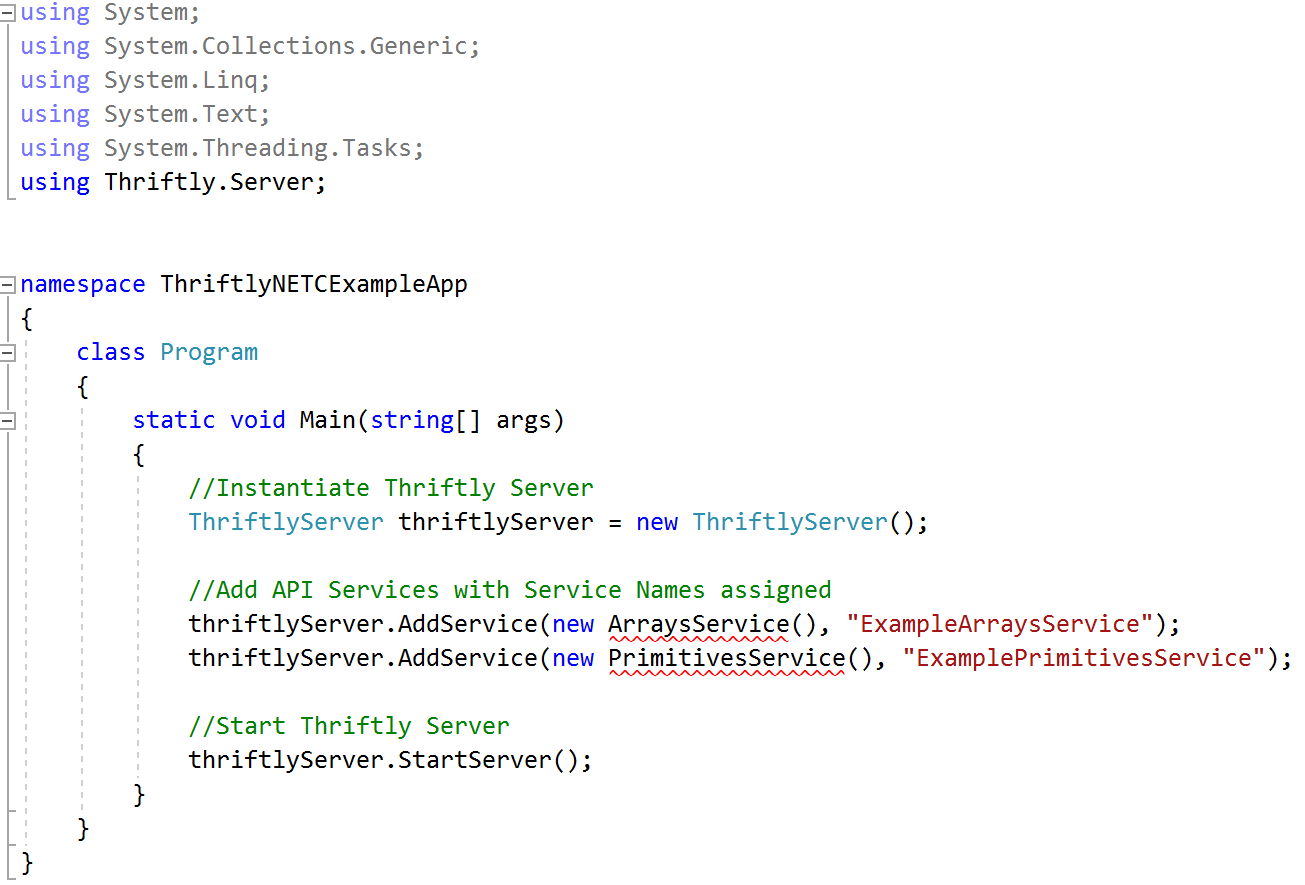
Be sure to examine this code as you integrate it into your project, rather than mindlessly copying it over. This code shows you how to connect an app to the Thriftly Server (which lets you access your APIs) and how to call the services that define your APIs. You’ll create these services in the next set of setup steps.
Creating the Services That Define Your APIs
You’ll now create the two services that define your APIs. As you create these services, note where and how you include the using Thriftly.Server directive and PublishedAttribute attribute. These two pieces of code define what services and functions are published to the Thriftly Server as APIs.
The first service you create will operate on primitive data types and include functions that return a string and a boolean value. To create this service:
From the Visual Studio toolbar, select Project > Add Class.
The Add New Item window appears. Select Class. Then, select Add to create a new class. Your class appears in Visual Studio.
Modify the default code to read as shown below. Again, note the placement of the using Thriftly.Server directive and the PublishedAttribute attribute:
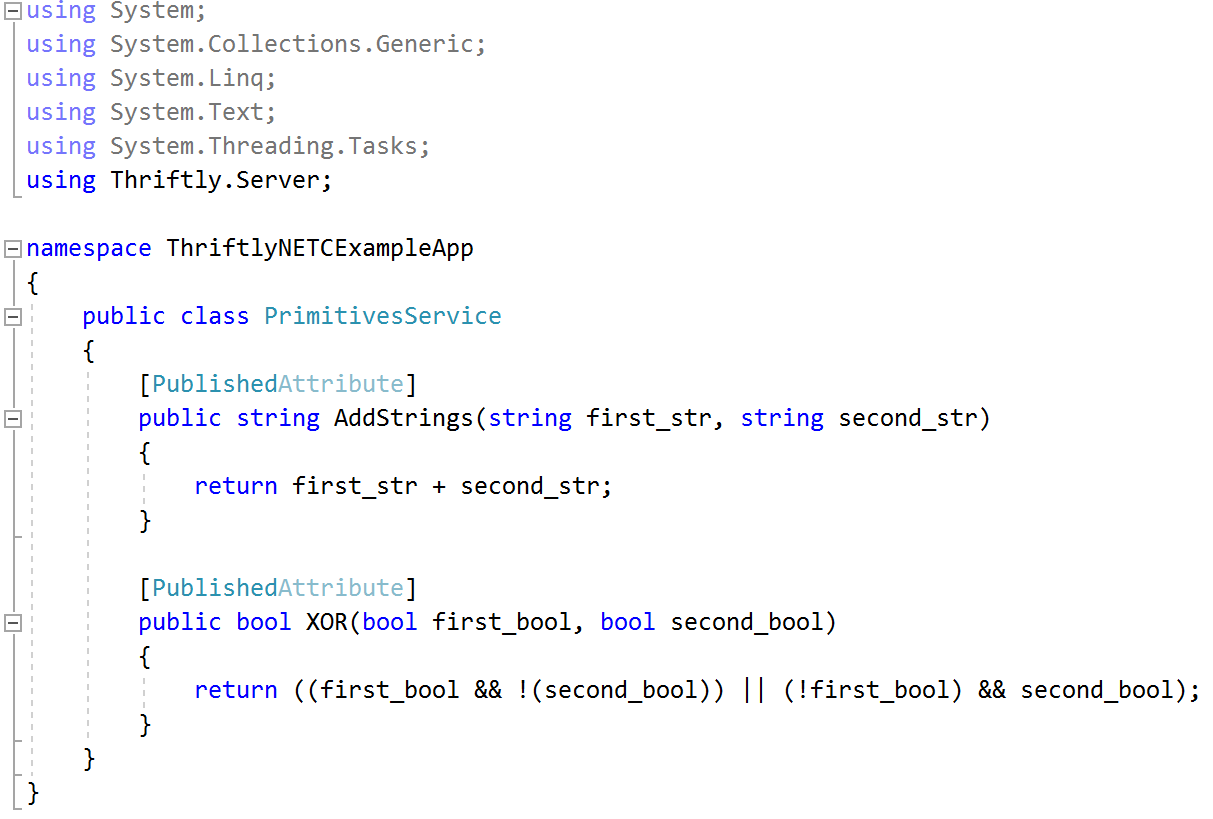
Save (File > Save As … ) the service as PrimitivesService.cs.
The second service you create will operate on arrays and include functions that return a list and a boolean value. To create this service:
From the Visual Studio toolbar, select Project > Add Class.
The Add New Item window appears. Select Class. Then, select Add to create a new class. The class appears in Visual Studio.
Modify the default code to read as shown below. Again, note the placement of the using Thriftly.Server directive and the PublishedAttribute attribute:
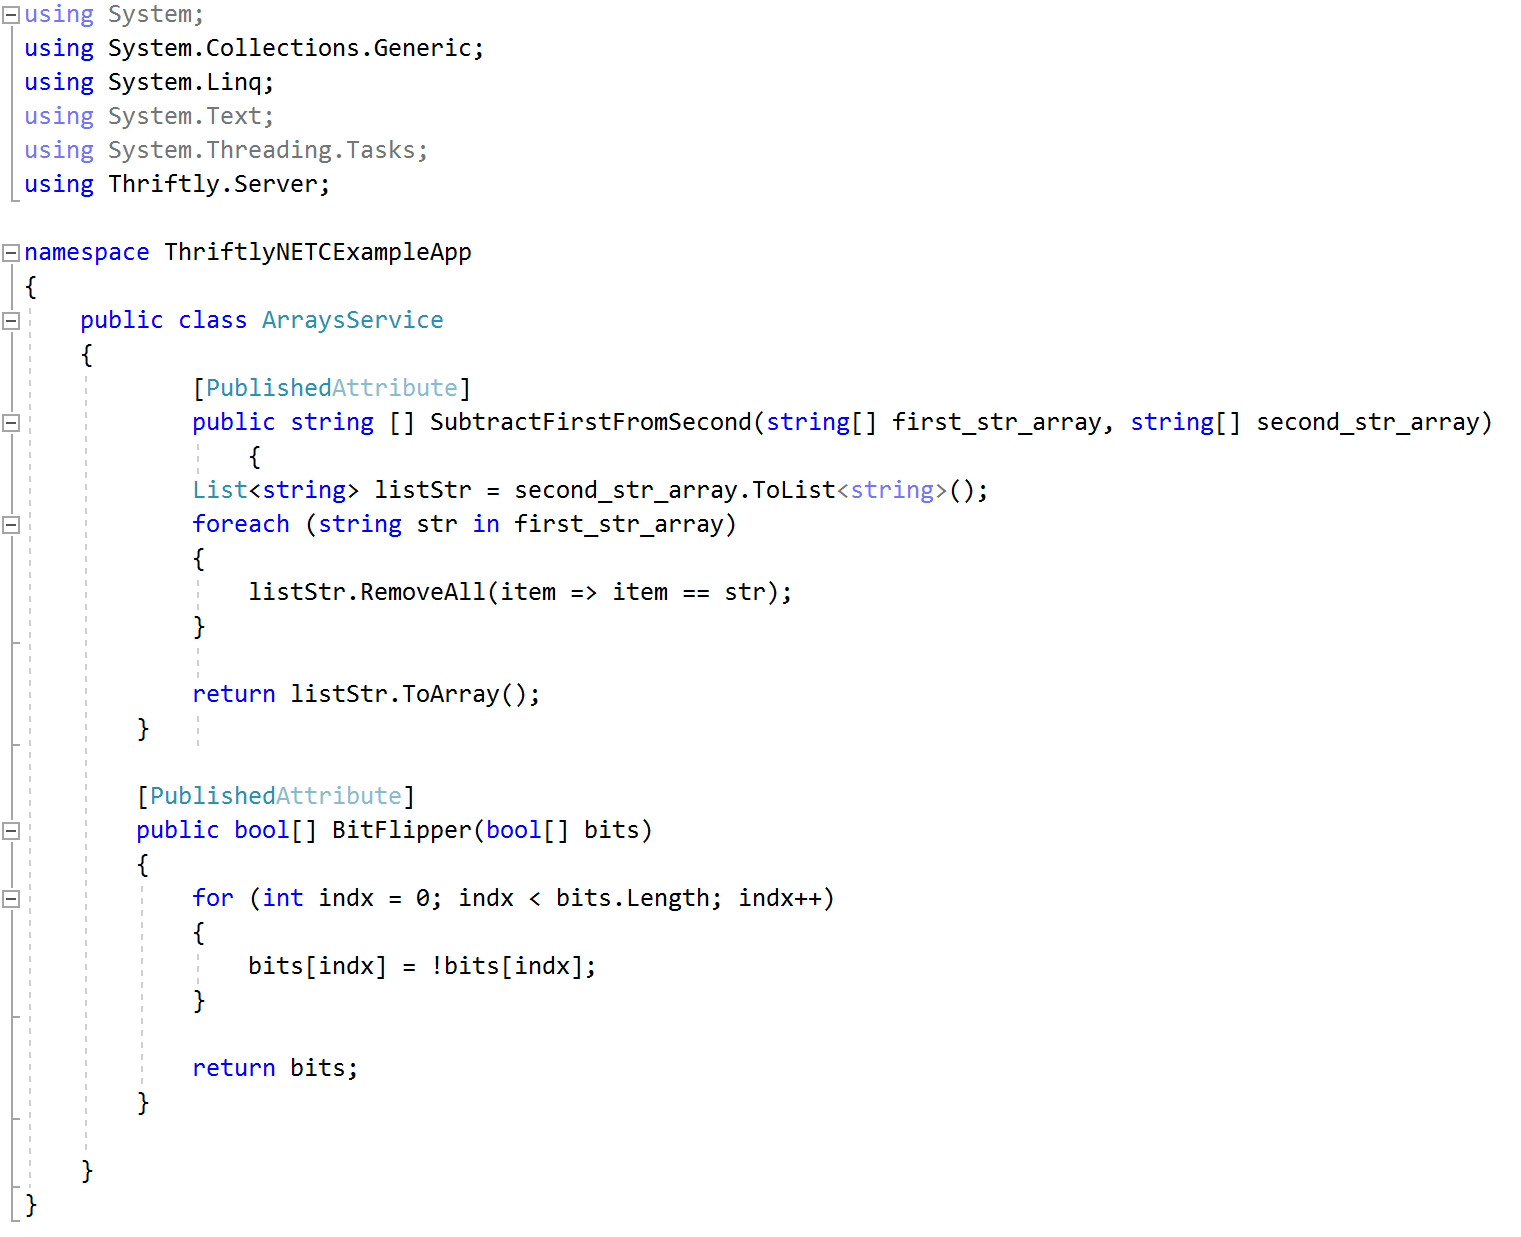
Save (File > Save As … ) the service as ArraysService.cs.
Running Your New Application and Testing Your APIs
Play around with your new application a bit to see how the APIs you created work.
From the Visual Code toolbar, select Build > Build Solution.
Select the Start button to run your application.
When you run your application, the Thriftly Developer window appears. This window allows you to start configuring and testing your APIs. To take the APIs you just created out for a test drive, refer to the Testing Your Thriftly API section.